Friday, June 28, 2013

Garden Party

As I said on a recent Facebook post, you leave for 10 days and your garden will have a party without you. Hoo-boy, howdy...no truer words!

See what you can see in this picture, taken on the morning after our return home.


It's a jungle out there!


Looking from the Box Garden (raised beds) back toward the southwest, you can see how some of the tomatoes have outgrown their cages...and almost over-topping their stakes.  The really tall ones you are looking at about center of the shot are German Johnsons, an Open-pollinated (AKA: "Heirloom") variety that is particularly happy here this year. In the right foreground, you are seeing the Fordhook Lima beans, growing up nicely in the box garden. Between the limas and the tomatoes, you can see the okra on the rise in the black fabric-covered row. And, off to the left, between the tomatoes and the fence and shed, you can see the daylilies in bloom.

Here are some of our daylilies, currently in bloom:

Elvis' Cape (and Abbie near Enon)
Alabama Jubilee


Joe Marinello


Persian Peach
Purple Pinwheel
Red Ribbons


No, I don't necessarily remember all of their names. I do need to look them up on occasion. Especially since we missed most of their blooms last year due to our extended stay in KY. Ah well, it's good to get reacquainted, don't you think?

Daylilies really bring the pollinators (bees and other beneficials) into the Way Back, which is good because most members of the cucurbit family are in bloom: the cucumbers (on a lattice-work trellis*), the yellow crookneck squash, the zucchini, and the watermelons (Sugar Baby and Crimson Sweet). The pumpkins and the muskmelons (which we persist in calling cantaloupes...:-) are not yet blooming...but that shouldn't be too much longer at the rate they are growing.

Crookneck Squash
 
 
Crimson Sweet Watermelon
Straight Eight Cucumbers on trellis


Now, all is not a bed of roses around the Kitchen Garden, sad to say. While we were away, the squash bugs came out to play...and lay eggs. Yuck. While I had kept them at bay for the early days of the vulnerable plants with row covers, when the cucurbits started to flower I had to remove the covers to give access to the pollinators, so they could do their part in giving us a good harvest. Upon my return, I was doing my due diligence in pest management when I noticed a few leaves that looked like this picture:


Where's my water bucket?

If you follow that link on squash bugs to the Organic Gardening site, you will learn that "they" recommend squashing the squash bugs on the leaf. My method is to cut the leaf off and dunk it in a pail of water. You see, I have a habit of tasting my harvest, straight off the vine...and I really don't want to think about having bug-egg guts on my gloves...or worse yet, on my fingers and under my nails.  Personal preference.

Speaking of tasting...

Sun Gold tomatoes
My tomatoes are beginning to ripen, and I just couldn't help myself. I popped one of these luscious Sun Golds from the bottom grouping in my mouth just after taking this picture. Can you blame me? Oh, how sweet it is! JA, my Master Gardener friend and mentor, was the first to sing the praises of this wonderful tomato. And, then I learned that it had won two out of three of the top honors in the Greensboro Tomato Festival last year. Promise: this one will be on my "must grow" list from now on!

Yes, the daylilies and the Kitchen Garden have been particularly productive while we were away, as has the Berry Patch. I was so excited to get a cup of blackberries and nearly 2 cups of blueberries.  My recipe for blueberry pie calls for 4 cups...and if I can stop eating the ones I've harvested, I hope to have enough to start baking this weekend.

If only I can stop eating the ones I've already harvested...

Blueberries!

Happy hoeing!


Thursday, June 20, 2013

Gardening Away

It's June...probably the most productive month in the garden. The tomatoes are turning from green to gold to red. The peppers are greening up. The squash are flowering and fruiting. You get the picture. All of this activity...and we are away.

We are visiting our daughter for a few days, so that part of being "away" is a good thing. She's a gardener, too, and her Zone 6 property sports a large herb garden, containers of flowers and veg, a couple of raised bed veggie gardens, and flowers, shrubs, and trees galore. It's always a treat to see how things have grown and changed since the last time we visited.

She reads extensively and puts many ideas into action, applying her own touches. One of the neatest ideas she implemented this year is a trellising system for her tomatoes. While the original source had a diagram-specific method of constructing the trellis, M bought two appropriate-height end-pieces and used an appropriate-length top beam from another project...and lots of garden twine, up and down. End result? No cuts! Brilliant! As you can tell from this picture, her tomato plants seem to love their new digs!


I also get to raid her library when I come for a visit. On this trip, I have enjoyed several gardening books and magazines, but I keep picking up one in particular.


Maureen Gilmer has written "The Small Budget Gardener," a handy how-to paperback on "saving money in your garden." The original printing was in the late 90's; this revised edition was printed in 2009. Geared to surviving and thriving in your garden in a tough economy, there are 11 chapters in three sections: Stretch Every Dollar, Environmental Cents, and Gratis — As it Should Be. My favorite of the moment? Making Babies: How to Propagate Free Plants. (Can you tell I've been trimming the chrysanthemums this week...and thinking about dividing all those iris?) While this isn't a step-by-step manual, you will find Tightwad Gardening Tips, checklists, pretty plant pictures, and well-illustrated ideas.  I like it!

So, when we return home, I'll be inspired to put some new ideas into action in our Gardens at home.

Happy hoeing!

Monday, June 17, 2013

Garlic from the Garden in Five Easy Steps

Don't you love it when a plan comes together? Here's a picture of the first harvest of garlic from our Kitchen garden in the Way Back. It's a variety called Early Italian that I purchased online last year from Burpee.


I must admit I tried growing garlic in our garden a couple of years ago, but that crop didn't make, for one reason or another. Those reasons all revolve around "I didn't really know what I was doing." If at first you don't succeed, read the directions and try again...which is just what I did last Fall.

Here are the Five Easy Steps to Growing Great Garlic in your Home Garden:

1. Plant garlic at the right time for your location. Here in USDA Zone 7 in the Piedmont of North Carolina, we plant garlic in the Fall for a late-Spring, early-Summer harvest. In Northern climates, garlic is planted in the Spring for a Summer harvest. Purchase non-treated garlic from a garden center, farm supply, or catalog source; while you may get grocery store garlic to sprout, it isn't reliable since non-organic, grocery garlic has been treated to prevent just that. 

Our experience: I ordered three varieties online from Burpee (Early Italian, Late Italian, and Viola Francese) about this time last year, and they were then shipped to me later for planting on September 8. The good news is that after you purchase your first "starter" bulbs, you can use their offspring to plant your next crop, etc. 

2. Plant garlic cloves (the individual "toes" of the garlic bulb) in well-draining soil that has been enriched with compost and in full sun, picking a spot in your garden that you don't mind relinquishing for the next 9-10 months. You can also plant garlic in fabric "grow bags" if you are reluctant to dedicate that much real estate to just one crop for so long. Plant the cloves with the pointed side up, 1" deep and 4" apart in rows 12-24" apart. 

Our experience: I planted two rows and one grow bag (using a mixture of top soil and compost for the growing medium in the bag). The tops of our Fall-planted garlic emerged in a couple of weeks and stayed green all through our mild Winter weather. I did take the precaution when a heavy frost was expected to mulch the tender greens with straw for protection. 

3. Garlic is fairly fuss-free: keep it weeded and watered (about 1" of water every week of its growing season until the weeks prior to harvest), and feed it in the Spring. Mulching will help maintain the moisture levels and inhibit weed growth. 

Our experienceA topping of compost in the early Spring and a once-monthly feeding with diluted fish emulsion were the only "extras" this crop received. 

4. You may notice that some garlic varieties produce flower stalks which have small bulges called bulbils. Garlic bulbils are the small bulbs that develop in the garlic scape if you leave it on the plant.


     Curly-cue garlic scape, showing the bulbil-bulge
Garlic scapes are often called garlic flowers, although scapes aren’t true flowers – the reproductive parts only partially form and they are not viable. The bulbils that form are clones of the mother plant...essentially mini-bulbs that will grow to be large bulbs if they are treated like normal garlic cloves. Cut these stalks off to ensure that all of the food the plant produces will go into making the garlic bulb and not the clusters of bulbils, unless you wish to dry the individual bulbils for planting. In June, the garlic plants stop producing new leaves and begin to form bulbs underground. Now is the time to remove any remaining mulch and stop watering. The garlic will store better if you allow the soil around the bulbs to dry out prior to harvesting.
Our experience: I snipped all the scapes this year, with one exception. I have saved several bulbils from that active stalk to dry and plant this Fall...just to see how they will grow. I also began to loosen the (hard-packed, clay) soil around the forming bulbs in the garlic row, to make it easier to harvest when that time came.
5. Harvest your garlic when the foliage yellows and begins to die back. Pick a day when no rain is in the forecast for 24 hours. Dig the bulbs out gently, using a hand-held garden fork, and then allow them to dry in the sun for the rest of the day. Cure them in a flat basket or on screens in a protected, dry place for a week or two. Cut tops off 1-2" above garlic bulbs, or braid the tops together into garlic strings for hanging. Store loose bulbs in a dry, cool, airy place in baskets; be sure to check your garlic often for any sign of mold or greening of the cloves.

Our experience: As you can see from the picture at the top, I put the newly-dug Early Italian garlic bulbs on black landscape fabric to dry in the sun. Then I gathered them into a newspaper-lined flat basket to finish curing in the garage, on top of the chest freezer...a cool, dimly lit spot. I hope to braid them for keeping through the next year. I plan to use the largest of each variety as my "seed" cloves for this Fall's crop. I will warn you about one thing, if you decide to store your garlic in an area you use on a daily basis: every time I go in the garage where the smell of garlic is so strong, I have an overwhelming urge to "cook something Italian for supper!"

Happy hoeing!

Thursday, June 13, 2013

Ah, Sweet (Corn) Mystery of Life

We planted a block of Silver Queen corn (3 wide double-rows = 6 rows, with about 56-58 surviving plants) on April 15th ("pay your taxes, plant your corn"). About six weeks later, I interplanted (down the center of the wide rows) with pink-eye purplehull peas...for the weed protection, for the crop of peas, and for the nitrogen "fix" they will provide. And all was growing well until...

Corn patch, flattened
after high winds
This week. Monday. High winds (clocked at about 40 mph at the airport) and driving rain. After it all blew over, I ventured out into the Way Back to find our corn flattened. Broke my heart when I saw it.

I immediately started researching what to do. I grabbed several of my gardening books; only one had anything about storm-damaged corn...and that was mainly about how to protect the corn before the storm comes (shoulda, woulda, coulda). I then began a web search and got many suggestions (stake it, pull it up and replant, do nothing, etc.) all over the map.

I posted the photo to Facebook, seeking sympathy as well as advice, and received several responses. One of those was from a friend whose father was both a rural letter carrier with Daddy out of the Henning Post Office and a farmer. He suggested I try to right the stalks before the heat baked the ground to bricks again.

While it made sense, it proved more difficult than I anticipated. I had to abandon my first and only attempt to raise the stalks when I slipped in the mud...and realized no one was around to hear me if I wound up on my back, calling "I've fallen and I can't get up!" It would just have to wait.

And "wait" is exactly what I did. I left the corn alone. I did nothing. And, amazingly, the stalks righted themselves!

Corn standing again...on its own...
three days later
I am still having a hard time believing what I am seeing. Hence the pictures...

Of course, I have no idea whether these stressed stalks will make a crop...or even if these stalks with survive the storms that are predicted for today: winds in excess of 60 mph...plus hail! That's almost hurricane-strength, folks. And hail took out my corn crop 3 years ago, although I had time to replant a late season crop then. Not this year...we are two weeks past the last day to plant corn in the Piedmont, so that's not an option.

We will just have to wait-and-see how things turn out after today's storms blow through. I'll keep you updated.


Friday, June 7, 2013

rain...rain...rain...rain...rain

Here comes the umpteenth rain shower of the week. Nice gentle rain...but rain, nonetheless. We've poured out the rain gauges twice in two days, and with the addition of the amount from earlier this week, we have captured over 2". For the past 24 hours, we have been northwest of the path of the first named tropical storm of the season, Andrea. Now we (the Big Blue Dot in the picture below) are due West of the storm (the whirling red symbol, below), and we are getting soaked. Could be a lot worse...we could be getting the nasty storms (the red boxes below), but thankfully we have been spared that misery.


So, I can't actually do any work in the Way Back, but I certainly can slip outside during a lull in the showers with my camera for some photos to share. A little rain cleanses the dust, dirt, and debris of daily life in a garden...more rain gives everything a "green and growing" look...still more rain, and the blooms on the flowers begin showing signs of being bruised and beaten. Ah well, we will ALL be grateful for this rainfall when the next hot, dry spell comes upon us.

Enjoy the pretty pictures:

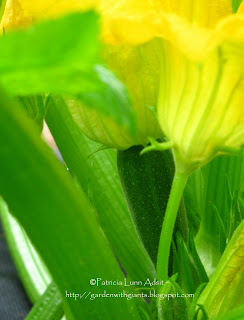
First Zucchini
Green Goliath tomatoes


Always and Forever rose
(Planted in 2013)

Edith Ann Daylily
Spanish Lavender


Chipmunk in the leaf bin


See you again when the sun shines!

Monday, June 3, 2013

We've Been Slow to Mow

Keeping a tidy, well-mown lawn might be a reason to get outside for some...but not for me. I get no special thrill from a lawn, which is, as a Master Gardener friend of mine says, a monoculture...and b-o-r-i-n-g.

One of the reasons I love this property so much is how little of the real estate is dedicated to lawns. Of course, the main reason for that is the number of towering trees around the house, making grass-growing an exercise in futility in the heavily-shaded areas. Ah, but in the Way Back, where the full-day sun would support more grass than the shade around the house, there is no lawn. None. Can I get a hallelujah? 

We do have to mow...on occasion. And by "we," of course I mean "Mr. T." The weeds and wildflowers that pass for grass in both the Orchard and the Berry Patch can get pretty tall and unkempt-looking if left to their own devices for too long. 

But in the Spring, I make a special request "to leave the daisies alone." We need to attract all the pollinators to the Way Back that we can, and the wild daisies are just the ticket. 


Additionally, we have several good randomly-placed patches of bird-planted milkweed (the host plant for Monarch Butterfly caterpillars) that need time to develop and flower. Monarch butterflies only lay their eggs on milkweed, and their caterpillars only eat milkweed. Many folks cut milkweed down in their yards because it doesn’t smell very good, or they think it is a weed. But these same people don’t realize that monarch butterflies need the milkweed in order to survive, and the monarch butterfly population is dwindling. Plus, milkweed isn't an easy seed to germinate...or, to transplant once it has been seeded, usually by birds and usually in an inconvenient spot. Protecting it is almost a mission.

We are in the process of adding a small (64 sq. ft) Pollinators Garden in the Orchard, complete with a bird bath...the second one in the Way Back. We want to increase the habitat for bees, butterflies, moths, beetles (like that soldier beetle on the daisy above), hummingbirds, and other pollinators. There is a marvelous online resource at www.pollinators.org where you can enter your zip code, and then get a PDF guide and plant list for your area. We will have four fav perennials suggested for our zip (aster, coreopsis, phlox, and hollyhocks); annuals like zinnias, marigolds, and sunflowers; and room for a couple more buddleias...as soon as I root them from cuttings from the one in the back yard.

Why all this attention on pollinators, you ask? According to the U.S. Fish and Wildlife publication Attracting Pollinators to Your Garden
  • Pollinators are nearly as important as sunlight, soil and water to the reproductive success of over 75% of the world’s flowering plants.
  • They are crucial to the production of most fruits, nuts, and berries on which people and wildlife depend.
  • Over 150 food crops in the United States depend on pollinators, including blueberries, apples, oranges, squash, tomatoes and almonds.

We want to make a conscious effort to ensure our little spot on this Earth is a welcoming oasis to the critters and creatures that make our plants healthier and our lives richer.  We have reduced our use of pesticides to almost nil (remember...even organic pesticides kill bugs, both bad and beneficials), and when we do spray or dust, we try for early mornings...when pollinators are least active. We plant herbs and flowers to attract beneficials as well as repel pests. We allow our natives as well as our weeds to have some growing room.

We will all benefit if we continue to be slow to mow.


Tomatoes from Suckers in Ten Easy Steps

Tomatoes in Row Garden, May 25
Hopefully, by now your tomato crop is coming along nicely. Ours is too, thank you very much for asking.

Row Garden, June 1:
Tomatoes in center row
Here in our Zone 7 Way Back Garden, the 6 transplants (two Celebrity, two Goliath, and two German Johnson...in foreground of picture, above/right) that were planted April 5th...ten full days ahead of the "optimum" time (AKA: the average last date of frost for the Piedmont, which is usually quoted as 4/15)...are growing strong and tall and bearing beautiful green fruit already. Even though we had to use row covers to protect the lot of them on a couple of occasions when the temps dipped below 45 degrees, I gambled and went against what I said in the recent Master Gardener program I did on Totally Tomatoes: "to be on the safe side, wait a week to ten days after ALDF before you plant your tomatoes." So much for playing it safe...and for "do as I say, not as I do."

Bush Early Girl, June 1,
in container on deck;
56 days after transplant
All the other tomatoes in the Row Garden (9 online-orders from Burpee added around 4/23: 3 Sun Golds, 3 Big Daddy hybrid, and 1 each grafted OPs Brandywine Pink, Brandywine Red, and Mortgage Lifter; 11 started indoors from seed, added about a month later: 3 Lemon Boys, 4 Roma, 2 Jet Stars, and 2 Juliets) are coming along well also, with a couple of those online-order Sun Golds fruiting up remarkably well already. The four bush varieties in containers (2 Early Girl bush, 1 Goliath Bush, and 1 Ace 55) are loaded with green fruit and yellow flowers. The Bush Early Girl that was planted 4/5 in a container on the deck actually has a red tomato (pictured left), only a couple days away from being my first BLT of the season.

In addition to bearing fruit (and tomatoes are fruits, botanically speaking, of course), tomatoes also go to great lengths to reproduce themselves by creating whole new plants...right there in the crotches between the main stem and a lateral branch. Those little suckers are known as, well...suckers.

Many folks who grow tomatoes see suckers as annoyances, as they can redirect the main plant's energy from producing fruit and must be pruned or removed, especially in the lowest 1-2 feet of the plant. But those same suckers can be a source of joy for the serious tomato gardener. Where some people see "more work," others see "more tomatoes!"

It's easy to start new plants...which will be clones, retaining the same genetic make-up of the parent plant...from those suckers you have to remove anyway in order to maintain the optimum production of the parent. That's a even-better proposition than trying to reproduce the characteristics of your favorite hybrid from saved seed, because hybrids notoriously are unreliable in this effort. Plus, with the high price of decent-sized so-called 'heirlooms' (a better name might be 'open-pollinated'), getting an off-spring with very little work cuts the cost in half. Because you will start with a 6-8" "cutting," you will have a jump-start on replenishing your mid-summer tomato crop, should one or more of the parent plants succumb to disease or insect invasion come late June or July.

Here are ten steps to get your new tomato crop started:

Removing a sucker from
hybrid tomato,
planted in Row Garden 4/23
  1. Pick an overcast day, preferably after a good, soaking rain (which will "plump up" the parent tomato), to remove a sucker for rooting. Suckers are those new stems that grow at the join of each lateral branch on a healthy tomato main stem. If you wish to start a new tomato by taking a cutting, allow the sucker to grow on the healthy parent tomato (no evidence of disease, please) to about 6-8 inches long, then gently cut the stem off just above the joint where it is starting, using sharp floral scissors (see picture). If the suckers have started flowering, that's OK.

    Helpful tip: Be sure to make a plant marker, showing the name of the parent tomato and the date you took the cutting...especially if you are taking more than one sucker-cutting from more than one variety of tomato.


  2. For each sucker, fill a container with a mix of good potting soil and compost, avoiding soil from your garden.  Any suitable container deep enough to accommodate one-half of the length of the sucker plus one inch will do. [For instance, if your sucker is 6" from cut to top, choose a container that is at least 4" deep: (6/2=3)+1=4.] You can use a commercial potting mix with fertilizer, if you wish, but fertilizer is not necessary to root tomato suckers. Still, it can be a time-saver after the sucker has rooted in the container.

    Another time-saving tip: always have a prepared container or two ready to receive a cutting.

  3. Gently snip off any branches or leaves on the lower half of the sucker, leaving at least 4 leaves at the top of the sucker. Avoid stripping any of the stem as this can create a pathway for pests.
  4. Dip the end of the sucker in rooting hormone and tap off any excess. Do you absolutely need to use rooting hormone? No. Does rooting hormone give your cutting a jump-start on developing a good root system? You betcha! Plus, I find that I get more successful rootings, increasing my plant count.
  5. Poke a hole in the soil in the prepared container with a chopstick or a pencil, and then push the sucker into the hole in the soil, being careful not to knock the hormone powder  (if used) off.   Plant the sucker at least halfway in the potting soil, with the leaves left on the upper portion above the soil line.  Gently firm up the potting mix around the sucker's stem.
  6. Water the container thoroughly. If necessary, add some more potting mix to maintain the proper depth of the sucker. Place the plant marker in the container to help you remember the variety.
  7. Place the container in a shaded area, providing protection from the harsh rays of the sun.
  8. Water daily to keep the soil moist while the sucker is rooting.  Don't worry if new tomato wilts for the first couple of days. By Day 3 or 4, it should be standing straight again.
  9. After about two weeks, begin checking the new tomato to see if roots are developing, by gently tugging on the stem.  In about three weeks, roots should have developed enough to  (a) move the new tomato to a larger container, if necessary to accommodate the root system, and (b) begin exposing the new tomato to direct sun.  You should also give the new tomato a feeding of diluted fish emulsion at this time.
  10. After 4-6 weeks, sun exposure should be up to "full sun" (6-8 hours/day) and the root system should be developed enough and to move the new tomato to a permanent location.  Congratulations! You have rooted a new tomato from a sucker!

New plants from rooted tomato suckers
Here is a shot of my own Sucker Garden to date (left).  I have rooted cuttings of the following varieties:
Sun Gold (in the purple containers)
Goliath
Celebrity
German Johnson (an open-pollinated 'heirloom' variety)
Brandywine Pink (an OP 'heirloom' that I ordered as a grafted tomato)


So far...so good! Only problem...where am I going to plant all these new garden members, hmmmm?