Showing posts with label Four Year Plan. Show all posts

Sunday, May 27, 2012

Gardening from Inside Out

Even when you can't get outside into your garden, you can still increase your yield by taking stock of your situation and increasing your knowledge. It's review time!


Today, in addition to recapping and reviewing our garden situation, I'll share my comments of a recently-read book with you, Landscape Planning - Practical Techniques for the Home Gardener, by Judith Adam. As she advises on page 43 in the section entitled "Putting it Down on Paper," "you may appreciate seeing the broad picture," so I will take a brief detour...back to where it all began...and attempt to paint a picture with words.

A regular reader of these posts will know that we have been in the planning phase for the Way Back Garden for 3 years now. We took what was essentially a tabula rasa (literally a scraped slate) of a more-or-less square quarter acre on the rear of our suburban lot (the house, driveway, and front/back yards occupy approximately 1/2 acre) and designed four garden "rooms" in what we call the Way Back Garden or WBG.

You will also know that, while we own the property, we also have an easement on most of the WBG, to Duke Energy for their transmission lines. We count ourselves fortunate that it's just the lines that cross our Way Back...no towers...and that, as long as it is under 15 feet tall and not a water feature nor a permanent structure (as in a building), we are good to go!

The previous owners, who built the house and landscaped the front and a small portion of the back yards, just left the Way Back to nature. So when we bought the property in 5/2009, we set about polishing up this neglected jewel by first having it mowed and scraped of the tangle of weeds and brush.

While you might imagine that...with no trees on the Way Back itself (Duke Energy had just come through the easement and whacked down everything that was growing a few months prior to our purchase), that we would be talking about full sun, all day long. And you would be as wrong as I was!

There are giant trees on the north and south sides of this easement, creating what is essentially a huge alley-way, approximately 125 feet square. The Way Back is defined by 8-foot "privacy" wooden fences on both the east and west sides; by a 4-foot "picket" wooden fence with a center gate for access from our back yard on the south side; and by a fledgling ligustrum and forsythia hedge across the north property line. There is also currently a temporary "farm yard" wire fence immediately behind the hedge-row to protect the young bushes from the overly-enthusiastic children of the neighbors beyond.

It is probably good to note that we didn't "design" the fencing across the rear of the Way Back like this. Duke Energy gave their approval to construct the privacy fence down the east side of the property (the one on the west side was already in place, built by our neighbor several years ago), transecting the transmission line alley. But, for reasons that defy logic but conform to the letter of the law, they would NOT allow us to put a fence across the north side, or paralleling the transmission line alley.

Put you a nice hedge across there, said the Duke engineer with the thick NC accent, when we asked what we could do? Of course, hedges do not hinder hounds when they are on a scent, so we had to build the picket fence across the back yard to keep the Drool Gang from going off on routine walkabouts.

Hedges...especially young,growing bushes...do not keep rambunctious kids at bay either. So when we added the first fruit trees to the Orchard on the northwest side of the Way Back, we put up the "temporary" fencing to protect our investment. Two years later and it's still standing...and doing a good job of keeping "them" out and keeping the dogs in. But, I'm getting ahead of myself here...and planning is all about "order and method."*

Some of you will be starting out, much as we did, with a blank slate of certain dimensions. Some of you will already have a garden** in some state of completion, but not the Garden of Your Dreams. Either way, it all begins with your Master Plan. The Master Plan can be summed up as:

1. Define where you are today: Point A.
2. Decide where you want to be at some point in the Future: Point B.
3. Determine how you will get from Point A to Point B.

Think of it as a road map. Know that there may be several interim stops along the way from Point A to Point B. And, you may have to take detours and u-turns and breaks before you reach your final destination, the Garden of Your Dreams. But given time, resources, and determination to succeed...you will succeed!

One the resources you may want to tap is the wealth of information "out there" on designing and planning the Garden of Your Dreams.

Wikipedia says:

"Garden design is the art and process of designing and creating plans for layout and planting of gardens and landscapes. Garden design may be done by the garden owner themselves, or by professionals of varying levels of experience and expertise. Most professional garden designers are trained in principles of design and in horticulture, and have an expert knowledge and experience of using plants. Some professional garden designers are also landscape architects, a more formal level of training that usually requires an advanced degree and often a state license. Many amateur gardeners also attain a high level of experience from extensive hours working in their own gardens, through casual study, serious study in Master Gardener Programs, or by joining gardening clubs."


As a Master Gardener, I almost always begin with the written word, since we are trained to use research-based information. Of course, not everything you read is researched-based, but published works are a good place to start.

Judith Adam has written an excellent multi-purpose book for gardeners in Landscape Planning - Practical Techniques for the Home Gardener, Second Edition, published in 2008 by Firefly Publishing. "Practical" is the watchword. From her "Ten Point Property Assessment" to her many and varied "10 Best..." lists ("10 Best Drought Resistant Shrubs;" "10 Best Flowering Shrubs and When to Prune Them;" etc.), Adam has written a garden book that you will return to, long after you think you have achieved the Garden of Your Dreams.

As it relates to our current discussion about planning, though, I think she has outlined the definitive approach: create a multi-year plan. In her case (as well as my own), she has recommended a 4-Year plan, and has given an excellent example on page 46. There is also an exercise to help the reader write up a 4-Year Plan, beginning on page 48.
She made my practical and realistic self sing when she wrote: "Look carefully at what you want to accomplish and establish a logical sequence of events that maximizes all your resources." (p. 42) For instance, you will want to design and create the basic "bones" (hardscapes, such as paths, benches, fences, rock borders, etc.) of your garden before you start sticking pretty flowers here and there...unless you are willing to move those flowers or see them crushed by the wagon hauling the mulch for a new side path. (OK, lesson learned the hard way...:). Hardscapes, you ask? Adam's book not only helps you decide on what you need where and why, it gives you ideas of how to use specific plants to make the most of your investment.

The one weak spot is the paltry "Home Gardener's Reference Library," found on page 238...and it doesn't even fill the whole page. Please. While this book would be a valuable asset in any gardener's library, we trust there must be more than 16 in Ms. Adam's.

I checked today, but there is still no digital version (Kindle, Nook, iTunes, etc.) of this book available. Too bad. It is the perfect reference to be able to search and bookmark and highlight...and not have to heave it off your bookshelf. Still, I imagine lifting this hefty tome will help keep a gardener's arm muscles toned...in order to tackle items on the 4-Year Plan!

Happy hoeing...and reading!


===================================

* "Order and method" is the way Agatha Christie's famous detective, Hercule Poirot solves all of life's mysteries. I'm certain he would approve of my using this approach to gardening.

** Although we in the USA usually use the word "garden" to describe the productive or Kitchen garden...and most often define the word further, i.e., rose garden, flower garden...as opposed to the "yard" or lawn-space, I am using the word to include all the outdoor areas of your property...vegetation as well as amenities.

Wednesday, May 2, 2012

Wrap Up for April; To Do's for Zone 7 Garden in May

Here's the wrap up on the Way Back Garden from April (look below for the May activities...:):

View of Kitchen Garden with new corner fences:
Lettuces, spinach, broccoli, and cabbage in foreground;
Early corn under cover in back. Taken 4/28/12
Things have been rolling right along, with lots of progress in all the gardens.  I eagerly tackled the planting checklist for the Kitchen Garden, following the average last frost date for our area (typically quoted as being April 15). Since we had experienced a later than usual frost, I had held off on getting many of the transplants and seeds in the ground (although I still had to make a mad dash 4/22/12 to cover some tender tomatoes and boxwood basil (in the photo, right) when I heard the weather forecast).

I'm happy to report that I got eight tomato transplants in, along with seven pepper plants. In the tomato row, I planted a German Johnson, a Marglobe, a Bush Goliath, two Early Girls, a Lemon Boy, a Bonnie Select, and a Rutgers. In the pepper row, I planted four sweet green bell peppers, a yellow bell, an early bell (which matures to red), and a Cubanelle. I still have seedlings of Better Boys, Jet Stars, Romas, and Juliets under grow lamps, along with Fish Peppers. These will all be ready to go into the garden in a couple of weeks, about the same time I plant the next four rows of corn.

I also got seeds planted for pole beans, bush beans, okra, yellow and zucchini squash, cantaloupes, watermelons, and cucumbers. Following a re-read of Louise Riotte's Carrots Love Tomatoes: The Secrets of Companion Planting (a new copy of which I downloaded to my iPad's Nook ap...:), I've interplanted herbs and flowers, such as basil and marigolds in the tomato row and nasturtiums with the squash...attempting to add some natural pest control. (I already have sage and onions planted with the cabbages and the broccoli.)

The blueberries and the blackberries have already flowered and are fruiting up nicely in the Berry Patch.  We knew if we wanted to have any fruit this year, we'd better get the bird nets up, so we did.  We also are seeing lots of strawberries, even though we probably should have removed all the flowers this year (per usual instructions for a new bed) to let them take root...as this is a new bed from the runners of the old bed (formerly in the space now occupied by the Rose Garden)...but I ask you, who can remove the pretty flowers?  Not I.

And I'm proud to report Mr. T put the last three trees in the Orchard, and got the last order of the English roses planted in the Rose Garden. We have three more hybrid teas on order, and that should do it for planting for this year...except for the perennials and annuals for accents, of course. There is ALWAYS an "except for...," isn't there?

So, here's what's on our 'To Do' List for May*:

Kitchen Garden:
·         May 1st is the beginning of the recommended planting time for bush lima beans (through July 1st), okra (through May 31st), and both sweet and hot peppers (through May 31st ).  May 15th marks the date to begin planting sweet potatoes (through June 15th).  I've got a good start on this one.
·         Continue planting pole beans (through July 1st), cantaloupe/muskmelons (through June 1st), sweet corn (through June 1st), cucumbers (through May 15th), pumpkins (through June 15th), summer and winter squash (through May 15th), tomato plants (through July 15th), and watermelons (through June 1st).
·         When setting out tomato plants, set up stakes or cages so you won’t disturb the roots later.  Be sure to remove any suckers to encourage the plant’s energy be used for larger fruit rather than side shoots. (I always attempt to root the suckers; many times I'm lucky and get a freebie tomato!)
·         When planting beans (pole and/or bush) and corn, make successive plantings every two weeks to ensure a longer harvest.
·         Plant basil and dill directly in your garden this month.

Orchard and Berry Patch:

·         Fertilize blueberries, blackberries, and grapes this month.  Read more about it in the NC Cooperative Extension publication Grapes and Berries for the Garden.

Rose Garden (and perennials and annuals):

·         To prevent black spot on roses, continue a weekly fungicidal spray regimen, if you don't use the 6-week systemic variety.   The latest research says NOT to remove black spot infected leaves UNTIL you don't see anymore green...thereby giving your rose bush all the help it needs in continuing to produce chlorophyll.
·         Prepare beds for summer annuals such as petunias, marigolds, and zinnias; a location with 6 or more hours of sun each day is ideal.

  • Additionally, on our list is to finish the Rose Garden Patio I wrote about in an earlier post.  We are installing three lattices that will support beautiful red mandevillas.   

Flowers, Shrubs, and Trees in the Front and Back yard gardens:

·         It’s time to plant summer-flowering bulbs, especially caladiums and gladioli. I already have some glads coming up that seem to have made it through the mild winter we had.  We shall see...

Our rhodo in full bloom in April.
Time to fertilize and prune in May.
·         Prune and fertilize Spring-flowering shrubs such as azalea and rhododendron (photo, right) after they have bloomed.

·         Remove broadleaf weeds from all landscape planting areas. If left to grow, they will rob water and nutrients from your plants.

Lawns and Grasses
·         According to the Home Lawn Calendar for May from the Center for Turfgrass Environmental Research and Education at NC State, mow tall fescue lawns at 3 to 3 ½”, and at least once each week.  This article also encourages grasscycling, which is the practice of leaving grass clippings on the lawn.  “Grass clippings decompose quickly and can provide up to 25 percent of the lawn's fertilizer needs.”  We actually use the clippings from the Way Back (around the Orchard and the Berry Patch) to "feed" the compost piles.  Good as gold!
·         Lawns need 1 to 1 ¼ inches of water per week.

Other             
  • Take some time to enjoy the butterflies, honeybees, and hummingbirds!  Remember to use low toxicity pesticides to protect these beautiful and beneficial creatures.  And, even though Neem Oil is marketed as an Organic spray, it is still toxic to bees...so don't spray when in the morning when bees are most active.
  • Move houseplants out-of-doors when the nighttime temperatures are consistently above 50 degrees.  
  • After incorporating finished compost into your garden, begin a new compost pile. Or, make this the year that you start composting.  Learn everything you ever wanted to know about the subject from the NC Cooperative Extension publication:  Composting: A Guide to Managing Organic Yard Wastes.


Remember, May is Melanoma/Skin Cancer Detection and Awareness Month.  Before you dash outside to your May gardening activities, put on a hat, sunglasses, and adequate sunscreen protection.

Happy hoeing!


==================================
* This May To Do List is updated and revised from an article I had published on GoGreenTriad.com in 2011.


Monday, April 2, 2012

Third Time's the Charm

It's Year Four for the Way Back Garden...and Year Three for my Gardening with the Giants blog.  Just as the start of Spring brings hope to every gardener and opens the possibilities of the coming months, so too has this Spring brought hope and possibilities to me.

Reclaiming the Way Back
100 bags of mulch
Paths done!
Only 50 bags of mulch to go!!


I am happy to report that, after a sad and unproductive 2011, this year is looking fantastic!  The Way Back went neglected and unattended last year, while our energies and efforts were directed to helping Mom in the final steps of her journey (the details of which I posted on the family blog The Adsit Adventure). But, in the first quarter of the year, we are making great strides at reclaiming our quarter-acre of paradise.

So far in 2012, we have:

Mr. T fills the potato grow bags
  1. Redesigned the Four Year Plan, designating the lower-left quadrant of the Way Back as the Kitchen Garden and the lower-right quadrant is now the Rose or Cutting Garden (we call it both...:).  The upper-left continues to be designated the Orchard and the upper-right continues to be the Berry Patch. (To recap, the Way Back is an almost-square quarter of an acre, fenced on all sides, nestled under the transmission lines of Duke Energy...the "Giants" of this blog's title.  The only trees are on the periphery, which means we have almost full sun in this area...great for veggies, fruit trees, berries, and roses.  We are making a silk purse out of a sow's ear, if ever...:)
  2. Planted a row each of cabbage, broccoli, spinach, lettuces, carrots, and beets in the Kitchen Garden. Onion sets were interplanted with the cabbage and broccoli. All are doing well, with the exception of the carrots...which have been slow to break through the crusty clay soil...and I still have the cabbage and broccoli under row covers to protect them from pests.  Weeded the asparagus bed, which is in its second year and beginning to produce shoots. 
  3. Planted 6 grow bags (purchased from Gardener's Supply; photo, above/right) of Yukon Gold potatoes (from seed potatoes, purchased at Tractor Supply) and one row of Russets (from potatoes sprouting in my kitchen, originally purchased at Harris Teeter grocery...:).
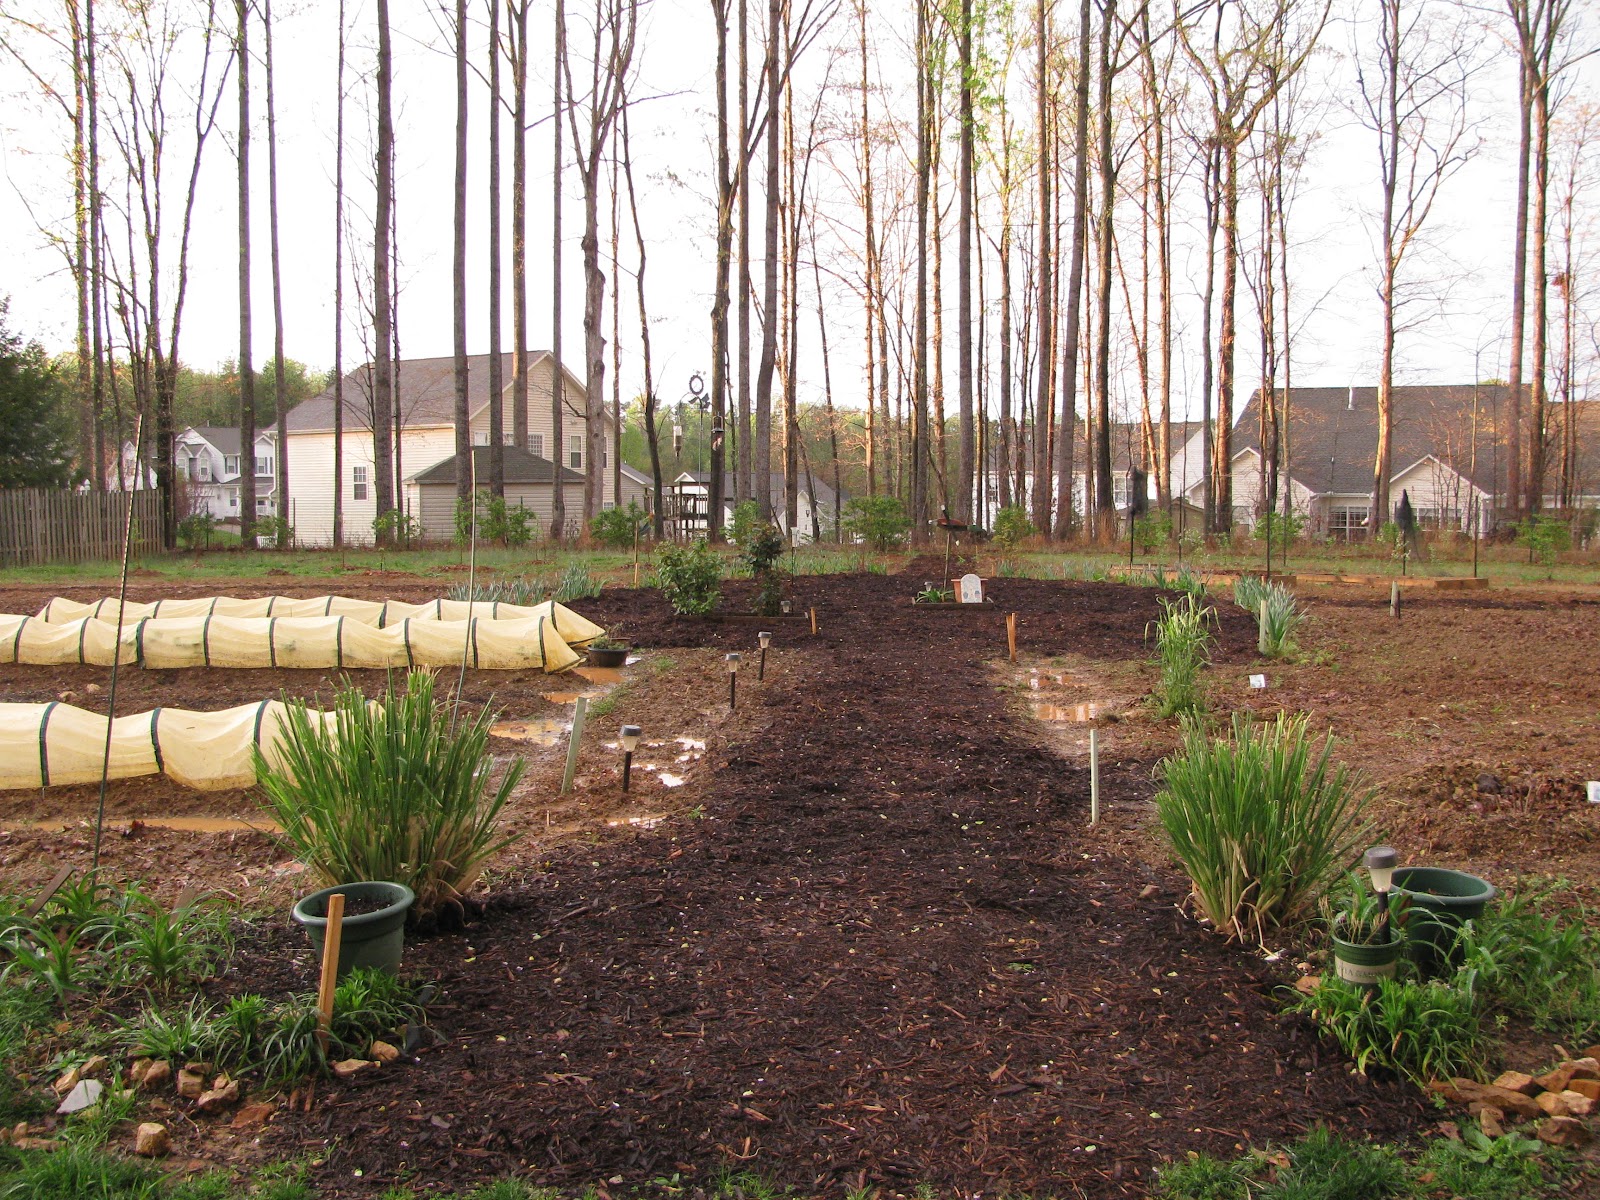
  4. Used over 100 bags of mulch (see "before"  and "mid-task" photos, above) to re-mark the paths and the Rondel, which is what we call the center oval where the paths dissect.  Prior to putting down the mulch, Mr. T put a layer of old newspapers, covered with a layer of Preen black landscape fabric. Hopefully, this will block the grass and weeds that sprouted through the original mulch in the Rondel.
  5. Ordered, received, and planted 11 new fruit trees from Stark Bro's Nursery in Louisiana, MO, in the previously-prepped holes in the Orchard. [Mr. T had triple-tilled the holes and added several bags of leaves as compost.] We now have planted 18 dwarf fruit trees (remember, we are limited by the easement agreement with Duke Energy to trees of 15 feet or under), including two cherry trees, three pear trees, two peach trees, ten apple trees, and one crabapple tree.  All are doing well, with the exception of one of the apple trees, which is one of the ones we purchased at Tractor Supply and planted last Spring.  I think it will need to be replaced this Fall.  Meanwhile, we plan a rest area in the Orchard, with a paver-patio and a covered swing (which we got on our last Tractor Supply run...:).
  6. Ordered, received, and planted 12 new roses from David Austin Roses (3 William Shakespeare, 3 Golden Celebrations, 2 Huntington Rose, 2 Gertrude Jekyll, and 2 Susan Williams-Ellis)  in the newly-tilled and prepped Rose Garden quadrant.  Mr. T has also assembled and stained a new teak glider that will be placed on a stone-paver patio we will lay.  We will place a bird bath and a feeder across the path from this patio, so that the bluebirds will have their own Bistro near the two bluebird houses on the fence.
  7. Tilled and retilled...and populated the new strawberry bed in the Berry Patch with runners from the "old" bed (that was tilled under to create the Rose Garden). We had so many runners that I have planted strawberries in every empty pot and hanging basket I could find.  All are doing well...and many are already flowering and fruiting. 
  8. Fertilized all the blueberries (which are already flowering), the blackberries, and the grapes in the Berry Patch.  Also, fertilized the crepe myrtles and privet.
  9. Seen our first snake of the season...and lived to tell the tale about it..:)
  10. Ordered and installed 2 (of 5) cottage garden corner fences, to mark the corners of ...and the path between...the Rose Garden and the Kitchen Garden.
  11. Pruned and started the feeding of all 18 rose bushes, in the back yard and in the Rondel.  Two didn't make it through the heat of last year's summer and the (mild) winter, so I replaced them in February.  All are looking good; most have buds already!
  12. Started 4 kinds of tomatoes and fish pepper seeds in peat pellets/egg cartons.  They are now under the grow light on the screen porch (which is still plasticized).  The tomatoes are getting their first true leaves (the ones that arrive after the seed-leaves) and will be ready to move into larger accommodations (3" pots) this week.
  13. Placed...and received (while I was composing this...:) our Lowe's order for the materials to construct two patios in the Way Back and one "pad" that will run from the driveway, under the double gates, and into the back yard.  More on this in a later post.
Whew!  I'm tired just recounting what we've already accomplished! Here are a couple of shots of some of the work:

Rondel and paths are mulched in the Way Back.
Row covers on the cabbage, broccoli, and lettuce (left)

Standing in the Rondel, looking toward the Berry Patch:
Blueberries in raised beds...blackberries behind them.
New Strawberry Bed on lower right.

We have an outstanding order with Roses Unlimited for 9 hybrid teas, and another order in with David Austin for 14 more English roses...all of which are scheduled to arrive over the next few weeks.  I got several perennials at Home Depot on Friday (when we took both cars to pick up 35 more bags of mulch to create mulch rings around the fruit trees...and to cover the path in the Rose Garden), and I will be adding those to the Rose Garden to give us some color while we are waiting on the English roses to grow.  I also picked up some herbs that I shall pot up in larger pots.  I am trying Boxwood Basil this year, with the plan to use it as a border between the Kitchen Garden and the center path.

Gus says...time for a break!
I have a long to-do list for the garden for this week, but I'll save it for the next post.  I don't know about you, but I need a break after all of that.

Lemonade, anyone?

Thursday, January 6, 2011

Beginning...Again

I'll admit it.  I've neglected this blog...far too long.  Last year (2010) was spent in the garden, not posting about the garden.  Today, that changes.  Beginning of the year.  Beginning of new habits.  Perfect time of the year to get in the habit ("...that thing which we repeatedly do") of writing my gardening articles on a regular basis.


The Garden, Year One (2009): 
Ten tomato plants, ten pepper plants.  And, Ducky.
 To recap, we are now beginning the third year of a four-year plan to turn the undeveloped half-acre in the rear of our suburban property into a productive and beautiful garden space.  We commonly refer to this space as the Way Back, which is located under Duke Power transmission lines.  We are fortunate that we only have the lines over our property; there are no transmission towers to contend with, thank goodness. Still, because they have an easement on that area of our property, there are some challenges to reach our gardening goals.  This blog is all about meeting those challenges head-on...and achieving our goals.

The basic plan is this:  we've divided the whole Way Back into four quadrants, bisected by a wide, central, mulched path.  Quadrant 1 is in the lower left as viewed from the gate, beginning on the north side of the picket fence.  Quad 2 is on the lower right.  Quad 3 is in the upper left, and Quad 4 is in the upper right.

Quads 1 and 2 are designated for vegetable and flower gardens, and have been the main focus of the past two years' work (2009 and 2010).  Quad 3 is to be the orchard and will be this year's main project (2011) .  Quad 4 is to be the berry patch and will be the main focus for next year (2012).  For folks who move, on average, every three years, making a four-year plan is quite a committment.  Making it happen will be just shy of a miracle!

So, what can you do in the garden in January, you ask?  Well, just like with personal habits, it's the month to take a look back at what worked in the garden last season/Summer, and then to make plans and set goals for the coming months.

Since it is so cold and damp outside at present, I am reviewing the photos I took of the garden this past season to refresh my memory.  When the weather warms up a bit, I plan to take a Coffee Walk (that's what I call my early morning stroll through the Way Back, where the garden space is located) with a small notepad in hand; I'll jot down some notes of things I want to do again...and things I want to change.

To keep it simple, I'll mention three things that worked great for us in the second year of the four-year plan:


Garden Year Two (2010):
Adding the wide center path
1.  We laid out the garden around a wide central path that leads to an area we call the Rondel (an oval-shaped area, directly under the center of the transmission lines.)  The path gives much-needed definition to the planting areas.  It is lined with recycled newspapers, covered with hardwood mulch; this keeps the weeds to a minimum.  It is also wide enough to accommodate the wagon and the wheelbarrow, making it easy to brings bags of garden soil amendments and mulch close to the spot where they will be used.  The Rondel (an idea we got from P. Allan Smith's TV gardening program) is where our resident pot-person, Hyacynth Bucket presides over the bounty.  Although the photo (right) does not show it, we lined the sides of the path with the rocks and stones that we removed from the planting areas.  More than one person has remarked on that little feature!
The Right Veggie Garden, Year Two (2010):
Adding amendments; setting up wide rows;
and creating a bean trellis (like Old Salem)

2.  We added loads of amendments to the (at times, rock-hard) clay soil, and we figured out how to get water to the area.  This area has not been worked or planted in years...if ever.  Duke Power whacked down any trees that sprouted and grew above their stated limit of 15 feet; any vegetation that lived was on its own for moisture and nourishment.  Remember:   there is no faucet to easily provide water to the Way Back.  Solution:  we had our sprinkler guy come put a faucet-like nozzle on one of the sprinkler heads, which he had re-positioned to be nearest to the garden.  Now, I can attach a feeder-hose from the nozzle to the web of soaker-hoses that snake through the rows and schedule watering of the whole area when the sprinkler goes off.  This is important because the water that comes through the sprinkler system is metered separately from the water that goes to the house; sprinkler-system water isn't charged the sewer fee...which is typically twice the amount of the charge for the water fee!
    
    Garden in Summer 2010:
    Flourishing peas and corn;
    Rondel and Hyacynth are visible
    
3.  We planted the garden using wide rows, mulching them with leaves, with cardboard moving boxes, and with straw.  The leaves we got from our own and our neighbors' oak trees when they fell in the previous Fall.  The cardboard moving boxes came from our move to NC.  It's all good!

In addition to the wide rows, we added the use of row covers to length our growing season and provide us with a fall crop of lettuce.  How exciting!  We'd never had a fall crop before, so this was really a keeper as far as we are concerned.  We will also use row covers in the spring and summer in an effort to control pests without using pesticides.


Visiting the gardens at Old Salem, NC
4.  We took some time out to visit other gardens. OK, that's a fourth thing, but very important.  I got the idea for the wide central path from the kitchen garden at Biltmore Estates, and we were encouraged in mixing vegetables and flowers in our garden by the ones we saw in Old Salem.

In the next post, I'll outline some things I want to do differently in the coming season.  Meanwhile, take some time to review your own photos...or, if you are fortunate enough to have warmer weather than we have, get out in your garden for a walkabout.  Take good notes...there'll be a test!  (Just kidding, of course...:)

Happy Hoeing!