Showing posts with label Summer. Show all posts

Monday, August 12, 2013

Blackberries: The Essence of Summer

What is Summer? Earlier this year, the Grow Write Guild asked "what plant encapsulates the essence of summer" for you? That's easy! For me, nothing shouts "it's Summertime!" like the blackberry!
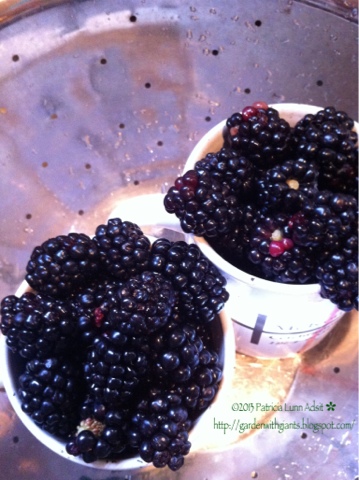


I see Summer, oozing from every ripe berry, which makes the colorful transition from the rich red of my ruby birthstone to the shiny ebony-black that announces the time for enjoying has arrived. I taste sweetness and warmth in every bite I pop in my mouth...straight from the bush or retrieved from my cup while still standing in the berry patch...who can bear to postpose gratification until the kitchen sink? I hear the long-ago peels of childhood laughter at finding the first arching canes, draped along the fence row on the farm, loaded with prizes for the picking. I feel the pricks and the scratches as the thorns try to keep me from the best rewards, deep within the bush...no matter; tis but a fleeting sensation, never deterring me for more than a moment.

When Mother Nature puts the "Ripe Now!" sign on the blackberries, I know that it is truly Summer!

Some things have changed with the years and across the miles. I no longer need to drive to the family farm for the annual outing to gather my favorite fruit; I have my own Berry Patch in our Way Back Garden. While I miss the comfort of connecting with cousins over common ground, I am thoroughly enjoying the convenience of having my very own U Pick 'Em.

Nor do I always need battle thorns, as we have planted two thornless varieties: Arapaho and Navajo. From North Carolina Cooperative Extension's online publication, Growing Blackberries in North Carolina:
The (Arapaho and Navajo) cultivars are from the University of Arkansas breeding program. These cultivars, named in honor of Native American tribes, do well in North Carolina...
Arapaho... Released by the University of Arkansas in 1993. Very erect, thornless, and suckers freely. Ripens 2 weeks earlier than Navaho, but has a short picking period. Fruit: good quality, medium size, short, conic, glossy black, firm, stores and ships better than most other blackberries; modest seed size. Up to this time has been resistant to double blossom in North Carolina, and orange rust has also seldom been observed. 
Navaho... Released by the University of Arkansas in 1988. Erect, thornless. Medium size berries of good quality; moderate to high productivity. Stores well, suitable for air transport. Susceptible to orange rust. Has not had a problem with double blossom in North Carolina up to this time.
Still, we continue to have the occasion to yell "ouch," as we also have several outcroppings of wild...and very thorny...bushes. We keep the wild ones so the birds will have their own...and hopefully leave "ours" for us, but can't resist taste-testing the tiny berries.

Growing blackberries is so easy...truly! Select a spot that gets full sun (8 hours daily), and where the soil tests to 6.0-6.5 pH. (We've added lime to the Berry Patch quadrant of the Way Back Garden per our 2011 Soil test recommendations to correct the high-acid 5.3 pH soil...great for blueberries; not "sweet" enough for blackberries and grapes.) In the late winter, I prune off any dead branches and spray with dormant oil, just like I do the Orchard and the Rose Garden...twice over a two-month period if the conditions are right...before any bud breaks. Then in the early spring, I feed each bush with 1/2 cup 10-10-10 and add mushroom compost in a collar around the base, just as the bushes begin to flower.


Since both of our varieties (Arapaho and Navajo) are erect or 'upright' blackberry cultivars, we have them planted 6 feet apart (for good air circulation) and supported by a two-wire trellis system; I use clothespins to help train the growing branches to the wires...when they put on fruit, those branches will get heavy. And that's it...just bide your time from early May (when the bushes flower) to early July (when the first fruits begin to ripen...and then enjoy the fruits of your labors!

The State of North Carolina publishes an excellent guide for growing Blackberries in the Home Garden; click here to go there.

And oh the wonderful things you can do with blackberries! How about a juicy cobbler? Yum! What about blackberry preserves? Most people make jelly or jam; me? I'm a fan of the seeds, if you can believe that, so I don't feel the need to strain them out of the finished product. But my grandfather did love a Jam Cake, made with blackberry jam...no seeds, please!

I had also hoped to have some blackberries to freeze, to enjoy my favorite fruit come next January. Alas, the season ended much too soon. Only managed a couple of quarts for the freezer. Sigh. Still this is only the second year for fruiting of these bushes, so I dream of heavier yields in the years to come.

Two last chores after the harvest and before we say goodbye to the blackberries for another year: 
(1) fertilizing with another 1/2 cup of 10-10-10, to encourage good growth of next year's fruiting canes; and (2) removing the 'spent' canes. You see, blackberries are produced on one-year-old canes, so the canes that produced so many lovely, juicy blackberries for us this year are done...spent...and must be lopped-off at ground level. Additionally, all those new canes need to be topped-off about a foot from the end of the new growth, to encourage the new canes to branch out with more new growth before frost.


All of these cuttings go into the yard waste toter and down to the street, off our property...not into the compost: too much opportunity for overwintering of insects and/or disease(s), so why take the chance?

Yes, the blackberry season is short and sweet, and I'm already anticipating breaking out one of those quarts of berries I have socked away in the freezer. But, no...must resist temptation for delayed gratification. 

A taste of Summer in the dead of Winter. The essence of a good life.

Saturday, August 3, 2013

Okra!

That most-Southern of all vegetables, okra, has recently been declared the Queen of our Kitchen Garden. Long live the Queen

I planted seeds of Clemson Spineless, an heirloom variety that is a vigorous plant and prolific producer; and Burgundy, Green Velvet, and Dwarf Green (the last three, obtained at the Seed Exchange at Old Salem in January) in the Row Garden on a hot day in early May. Okra is a native of Africa...brought to Brazil by slaves in 1658 and then to New Orleans...so it wants full sun and hot weather, along with near-neutral pH of 6.7-7.5...and needs soil temperatures of 60 degrees or above to germinate. 

Speaking of germination. Watered those newly-planted seeds and waited. Nearly all of the Clemson Spineless seeds germinated, and most of the Burgundy. The Dwarf Green came in at about 60%, and the Green Velvet had a poor showing with only 40% germination. Replanted the seeds that didn't germinate. After a few weeks, we had a double-row of healthy, growing plants. As the heat of the summer arrived, the stalks grew taller and wider...and, after all the rain in June and July, we found ourselves with a forest of okra. 

Even if you don't like the taste (or more likely the texture, which some describe as "slimy") of cooked okra...and I'm with you, if you are boiling the stuff...you can appreciate the beautiful flowers on the tall green...or in the case of the burgundy variety, red and green...stalks. With all those lovely butter-yellow blossoms, it's easy to tell that okra is a relative of hibiscus (and of cotton...:-). Gorgeous! Even the bees love 'em. 


Okra has very few pest problems. Insects that might appear on your plants include stink bugs and other leaf-footed critters; I hand-pick with my soap can at the ready. Flea beetles? I'm trialing spinosad in the form of Bonide's Captain Jack's Dead Bug Brew on all the leaf-chewing critters this year...so far, so good. Japanese beetles are sometimes a bother, although I find they like my green bean vines and my roses much more; use insecticidal soap on them as well as aphids if you feel you must. Because I know that bees favor the flowers, however, I'm willing to put up with the bugs that respond to sprays...or to try to limits any sprays like neem to times when bees aren't active in the garden.

Okra is one of those plants you must visit every day. The pods that follow those lovely blooms are ready in as few as 2-3 days, and you will want to cut the pods before they begin to mature and turn woody, if you are planning to eat them. Ideally, the tender pods between 2-4" long are best...about the same length as your thumb. Even if you miss a pod, hiding out under those giant leaves (easily done...says the Voice of Experience...:-), you need to cut it, in order to encourage continued production by the plant. I usually return the over-ripe pods to the compost, but I've also seen them used in craft projects, like the ones my cousin Betty Jean once made into Santa ornaments for the Christmas tree. Clever!

For me, I wear gloves and use garden clippers when I am harvesting okra. Even the Clemson "spineless" variety that is my best producer has a prickly hide and can leave "splinters" in an unprotected finger. And then I try to either cook, pickle, or freeze the pods as soon as possible...or share them with my neighbor across the street as payment for all those bags of leaves she shared last Fall. Not sure what to do with all that okra? Check out Southern Living's Top 10! Just remember: use it quickly as okra doesn't keep long. 

Speaking of harvesting...time to go get some more okra. I think I hear those pods growing, even as I type! 

====================== 

I've posted a recipe for Slow-cooker Gumbo over on the family blog, The Adsit Adventure. Click here to go there.

Friday, June 28, 2013

Garden Party

As I said on a recent Facebook post, you leave for 10 days and your garden will have a party without you. Hoo-boy, howdy...no truer words!

See what you can see in this picture, taken on the morning after our return home.


It's a jungle out there!


Looking from the Box Garden (raised beds) back toward the southwest, you can see how some of the tomatoes have outgrown their cages...and almost over-topping their stakes.  The really tall ones you are looking at about center of the shot are German Johnsons, an Open-pollinated (AKA: "Heirloom") variety that is particularly happy here this year. In the right foreground, you are seeing the Fordhook Lima beans, growing up nicely in the box garden. Between the limas and the tomatoes, you can see the okra on the rise in the black fabric-covered row. And, off to the left, between the tomatoes and the fence and shed, you can see the daylilies in bloom.

Here are some of our daylilies, currently in bloom:

Elvis' Cape (and Abbie near Enon)
Alabama Jubilee


Joe Marinello


Persian Peach
Purple Pinwheel
Red Ribbons


No, I don't necessarily remember all of their names. I do need to look them up on occasion. Especially since we missed most of their blooms last year due to our extended stay in KY. Ah well, it's good to get reacquainted, don't you think?

Daylilies really bring the pollinators (bees and other beneficials) into the Way Back, which is good because most members of the cucurbit family are in bloom: the cucumbers (on a lattice-work trellis*), the yellow crookneck squash, the zucchini, and the watermelons (Sugar Baby and Crimson Sweet). The pumpkins and the muskmelons (which we persist in calling cantaloupes...:-) are not yet blooming...but that shouldn't be too much longer at the rate they are growing.

Crookneck Squash
 
 
Crimson Sweet Watermelon
Straight Eight Cucumbers on trellis


Now, all is not a bed of roses around the Kitchen Garden, sad to say. While we were away, the squash bugs came out to play...and lay eggs. Yuck. While I had kept them at bay for the early days of the vulnerable plants with row covers, when the cucurbits started to flower I had to remove the covers to give access to the pollinators, so they could do their part in giving us a good harvest. Upon my return, I was doing my due diligence in pest management when I noticed a few leaves that looked like this picture:


Where's my water bucket?

If you follow that link on squash bugs to the Organic Gardening site, you will learn that "they" recommend squashing the squash bugs on the leaf. My method is to cut the leaf off and dunk it in a pail of water. You see, I have a habit of tasting my harvest, straight off the vine...and I really don't want to think about having bug-egg guts on my gloves...or worse yet, on my fingers and under my nails.  Personal preference.

Speaking of tasting...

Sun Gold tomatoes
My tomatoes are beginning to ripen, and I just couldn't help myself. I popped one of these luscious Sun Golds from the bottom grouping in my mouth just after taking this picture. Can you blame me? Oh, how sweet it is! JA, my Master Gardener friend and mentor, was the first to sing the praises of this wonderful tomato. And, then I learned that it had won two out of three of the top honors in the Greensboro Tomato Festival last year. Promise: this one will be on my "must grow" list from now on!

Yes, the daylilies and the Kitchen Garden have been particularly productive while we were away, as has the Berry Patch. I was so excited to get a cup of blackberries and nearly 2 cups of blueberries.  My recipe for blueberry pie calls for 4 cups...and if I can stop eating the ones I've harvested, I hope to have enough to start baking this weekend.

If only I can stop eating the ones I've already harvested...

Blueberries!

Happy hoeing!