Wednesday, May 2, 2012

Wrap Up for April; To Do's for Zone 7 Garden in May

Here's the wrap up on the Way Back Garden from April (look below for the May activities...:):

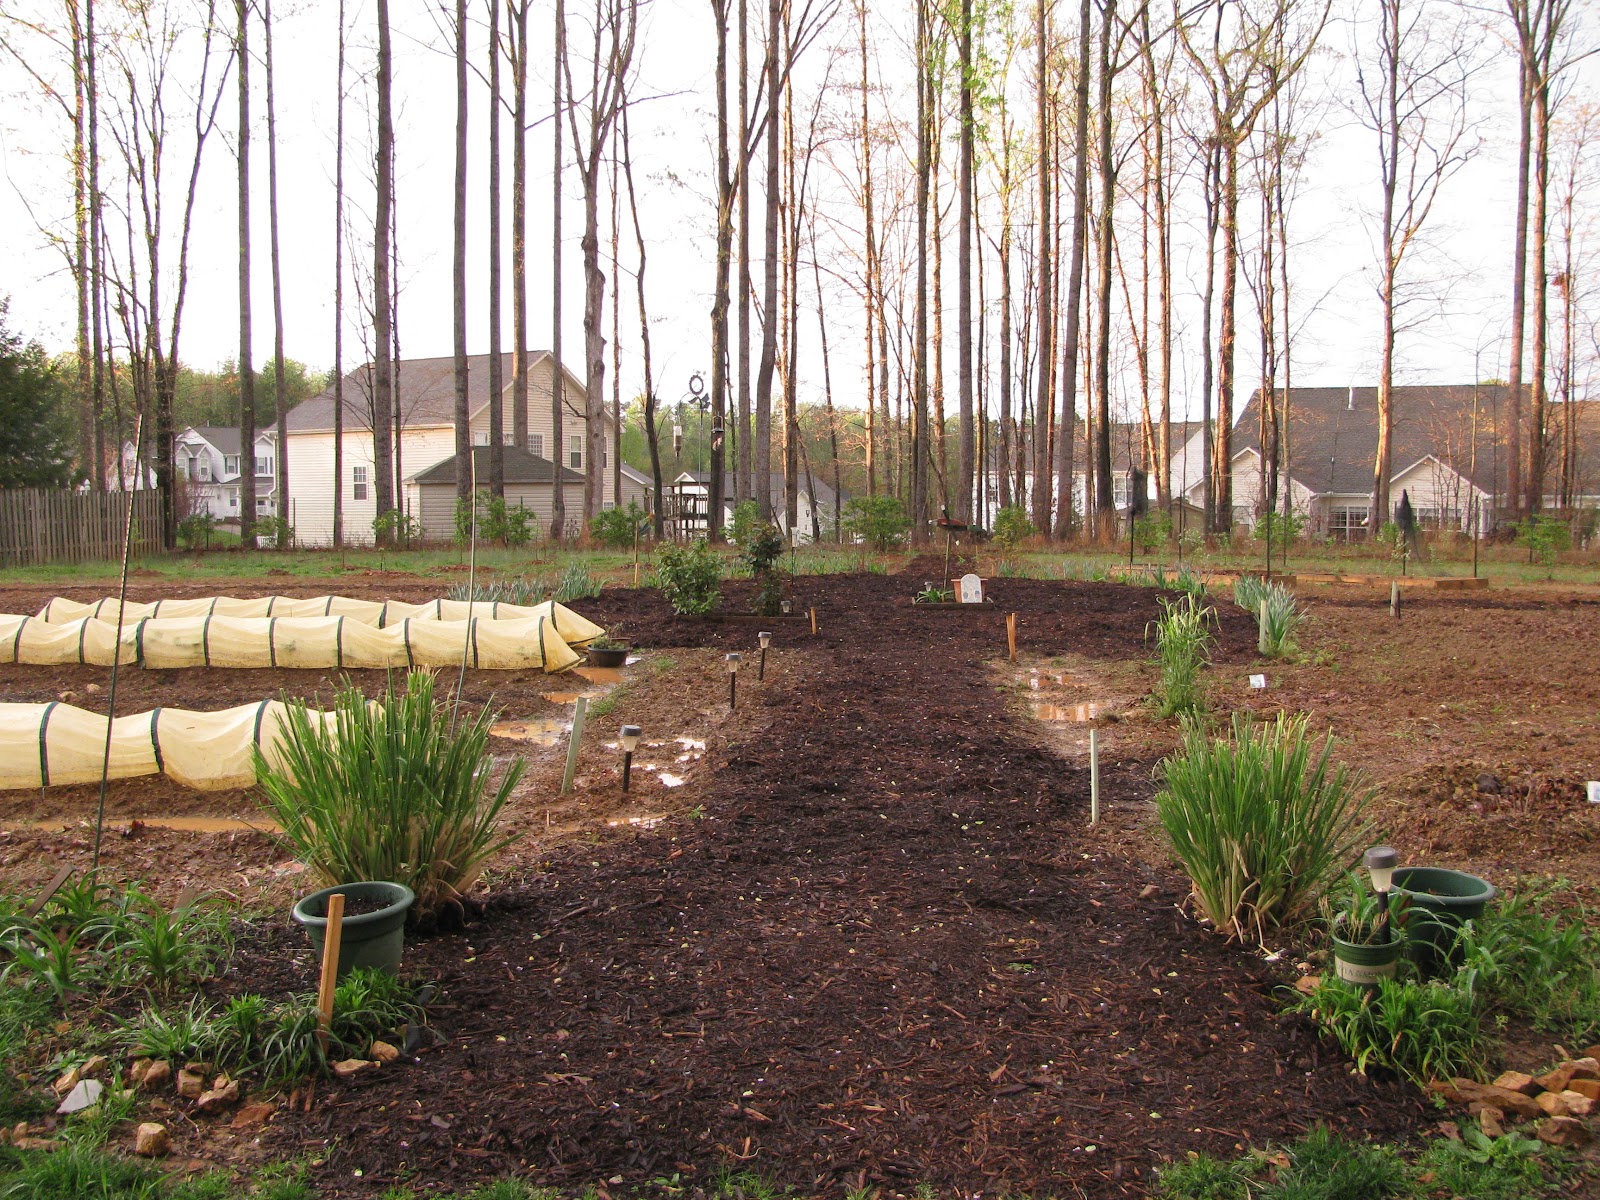
View of Kitchen Garden with new corner fences:
Lettuces, spinach, broccoli, and cabbage in foreground;
Early corn under cover in back. Taken 4/28/12
Things have been rolling right along, with lots of progress in all the gardens.  I eagerly tackled the planting checklist for the Kitchen Garden, following the average last frost date for our area (typically quoted as being April 15). Since we had experienced a later than usual frost, I had held off on getting many of the transplants and seeds in the ground (although I still had to make a mad dash 4/22/12 to cover some tender tomatoes and boxwood basil (in the photo, right) when I heard the weather forecast).

I'm happy to report that I got eight tomato transplants in, along with seven pepper plants. In the tomato row, I planted a German Johnson, a Marglobe, a Bush Goliath, two Early Girls, a Lemon Boy, a Bonnie Select, and a Rutgers. In the pepper row, I planted four sweet green bell peppers, a yellow bell, an early bell (which matures to red), and a Cubanelle. I still have seedlings of Better Boys, Jet Stars, Romas, and Juliets under grow lamps, along with Fish Peppers. These will all be ready to go into the garden in a couple of weeks, about the same time I plant the next four rows of corn.

I also got seeds planted for pole beans, bush beans, okra, yellow and zucchini squash, cantaloupes, watermelons, and cucumbers. Following a re-read of Louise Riotte's Carrots Love Tomatoes: The Secrets of Companion Planting (a new copy of which I downloaded to my iPad's Nook ap...:), I've interplanted herbs and flowers, such as basil and marigolds in the tomato row and nasturtiums with the squash...attempting to add some natural pest control. (I already have sage and onions planted with the cabbages and the broccoli.)

The blueberries and the blackberries have already flowered and are fruiting up nicely in the Berry Patch.  We knew if we wanted to have any fruit this year, we'd better get the bird nets up, so we did.  We also are seeing lots of strawberries, even though we probably should have removed all the flowers this year (per usual instructions for a new bed) to let them take root...as this is a new bed from the runners of the old bed (formerly in the space now occupied by the Rose Garden)...but I ask you, who can remove the pretty flowers?  Not I.

And I'm proud to report Mr. T put the last three trees in the Orchard, and got the last order of the English roses planted in the Rose Garden. We have three more hybrid teas on order, and that should do it for planting for this year...except for the perennials and annuals for accents, of course. There is ALWAYS an "except for...," isn't there?

So, here's what's on our 'To Do' List for May*:

Kitchen Garden:
·         May 1st is the beginning of the recommended planting time for bush lima beans (through July 1st), okra (through May 31st), and both sweet and hot peppers (through May 31st ).  May 15th marks the date to begin planting sweet potatoes (through June 15th).  I've got a good start on this one.
·         Continue planting pole beans (through July 1st), cantaloupe/muskmelons (through June 1st), sweet corn (through June 1st), cucumbers (through May 15th), pumpkins (through June 15th), summer and winter squash (through May 15th), tomato plants (through July 15th), and watermelons (through June 1st).
·         When setting out tomato plants, set up stakes or cages so you won’t disturb the roots later.  Be sure to remove any suckers to encourage the plant’s energy be used for larger fruit rather than side shoots. (I always attempt to root the suckers; many times I'm lucky and get a freebie tomato!)
·         When planting beans (pole and/or bush) and corn, make successive plantings every two weeks to ensure a longer harvest.
·         Plant basil and dill directly in your garden this month.

Orchard and Berry Patch:

·         Fertilize blueberries, blackberries, and grapes this month.  Read more about it in the NC Cooperative Extension publication Grapes and Berries for the Garden.

Rose Garden (and perennials and annuals):

·         To prevent black spot on roses, continue a weekly fungicidal spray regimen, if you don't use the 6-week systemic variety.   The latest research says NOT to remove black spot infected leaves UNTIL you don't see anymore green...thereby giving your rose bush all the help it needs in continuing to produce chlorophyll.
·         Prepare beds for summer annuals such as petunias, marigolds, and zinnias; a location with 6 or more hours of sun each day is ideal.

  • Additionally, on our list is to finish the Rose Garden Patio I wrote about in an earlier post.  We are installing three lattices that will support beautiful red mandevillas.   

Flowers, Shrubs, and Trees in the Front and Back yard gardens:

·         It’s time to plant summer-flowering bulbs, especially caladiums and gladioli. I already have some glads coming up that seem to have made it through the mild winter we had.  We shall see...

Our rhodo in full bloom in April.
Time to fertilize and prune in May.
·         Prune and fertilize Spring-flowering shrubs such as azalea and rhododendron (photo, right) after they have bloomed.

·         Remove broadleaf weeds from all landscape planting areas. If left to grow, they will rob water and nutrients from your plants.

Lawns and Grasses
·         According to the Home Lawn Calendar for May from the Center for Turfgrass Environmental Research and Education at NC State, mow tall fescue lawns at 3 to 3 ½”, and at least once each week.  This article also encourages grasscycling, which is the practice of leaving grass clippings on the lawn.  “Grass clippings decompose quickly and can provide up to 25 percent of the lawn's fertilizer needs.”  We actually use the clippings from the Way Back (around the Orchard and the Berry Patch) to "feed" the compost piles.  Good as gold!
·         Lawns need 1 to 1 ¼ inches of water per week.

Other             
  • Take some time to enjoy the butterflies, honeybees, and hummingbirds!  Remember to use low toxicity pesticides to protect these beautiful and beneficial creatures.  And, even though Neem Oil is marketed as an Organic spray, it is still toxic to bees...so don't spray when in the morning when bees are most active.
  • Move houseplants out-of-doors when the nighttime temperatures are consistently above 50 degrees.  
  • After incorporating finished compost into your garden, begin a new compost pile. Or, make this the year that you start composting.  Learn everything you ever wanted to know about the subject from the NC Cooperative Extension publication:  Composting: A Guide to Managing Organic Yard Wastes.


Remember, May is Melanoma/Skin Cancer Detection and Awareness Month.  Before you dash outside to your May gardening activities, put on a hat, sunglasses, and adequate sunscreen protection.

Happy hoeing!


==================================
* This May To Do List is updated and revised from an article I had published on GoGreenTriad.com in 2011.


Thursday, April 19, 2012

Everything Will Soon Be Coming Up Roses

As I have said in earlier posts, we have tinkered with our Master Plan for the Way Back Garden...consolidating the Kitchen Garden to the First Quadrant (left of the main path, as you enter through the gate), and creating a Rose Garden to the right in the Second Quadrant.

Easier planned than done.  Have I mentioned that we have clay soil?  Rocky, clay soil.  Rock-hard, rocky clay soil.  Still, we can dream...

No, we can turn that dream into a reality!  And, we've come a long way toward that goal since I last posted.  We now have planted 28 David Austin so-called English (shrub) rose bushes and 6 hybrid teas in the space that once grew corn and purple-hull peas.  Plus, we have completed an 8x10 patio of 24" concrete pavers (yes, they weigh every last ounce as much as you might think they would...:) and a new birding area we are calling the Bluebird Bistro in honor of its proximity to the fence with two active bluebird houses.

It's been a busy week indeed!

First, here's the skinny on our new Rose Garden:

1.  We first decided on where the "hardscapes" would be.  We added cottage corner fences to outline the edges of the Rose Garden (see photo). We wanted a paver-patio, sized large enough to place our new teak glider and a couple of side tables on...with plenty of "floor" space for rugs for the dogs to enjoy.  We sited its location angled across the southeast corner of the garden (the main "boundary" path runs south to north, on the west side of the Rose Garden, with the other "boundary" path running east to west on the north side of the Rose Garden; there is a fence and fence-row marking the east boundary of the Rose Garden.)  We also wanted a birdbath and bird feeders, sited opposite the patio...across the winding path through the Rose Garden.  In addition to roses, I wanted to use perennials (in the ground) and annuals (in containers) for color and interest.

2.  We made our rose selections using several sources, including the David Austin catalog and website (http://www.davidaustinroses.com/american/advanced.asp.  We had read an excellent book on the subject, entitled 100 English Roses for the American Garden, by Clair G. Martin (the curator of roses at the prestigious Huntington Botanical Gardens)...and we were hooked!  We had never grown English roses before, but were encouraged after reading about the successful trials of several of the varieties.  We decided on:
Rose Garden taking shape

  • Abraham Darby (pink) - 3
  • Brother Cadfael (pink) - 3
  • Gertrude Jekyll (pink) - 2
  • Golden Celebrations (yellow) - 3
  • Huntington Rose (pink) - 2
  • Molineux (yellow) - 3
  • Pat Austin (copper/apricot - 3
  • William Shakespeare 2000 (red) - 6
  • Winchester Cathedral (white) - 3
  • Susan Williams-Ellis (white) - 6


3.  We also ordered three each of some "special" hybrid teas:  the All America Rose Selections winners from each of our birth years:  Sutter's Gold (for Mr. T), Chrysler Imperial (for me), and Friendship (for Missy M).  I located a reliable source for these in Roses Unlimited, which is "almost" local in Laurens, South Carolina. (Their website won't win any awards, but we have been quite pleased with the roses we have received so far.) We already had the AARS winner from the year of our wedding (America, a climbing rose) on a trellis, and a Chrysler Imperial in the back yard, but I was concerned about moving it.


4.  We placed our orders online and received our shipments without a hitch.  Although we have one more shipment from Roses Unlimited due to arrive in May, I have no doubt it will arrive without a problem.

5.  We planned where the roses would go in the garden....first on paper, then Mr. T transferred this to an Excel spreadsheet.  He then made markers for the roses, using metal coat hangers that he fashioned into stakes.  I snipped pictures of the roses from one of the two David Austin catalogs we had ordered and put them inside plastic sleeves (like you find at Office Depot).  He sealed up the sleeves with heavy packing tape so they would have some weather resistance.

You may wonder why we took this step...until you realize how easy it is to forget what color/height/growth pattern, etc. a Gertrude Jekyl rose has compared to a Winchester Cathedral.  We used these neat markers to go out into the freshly tilled and raked...but completely empty...Rose Garden and "place' the roses for effect.  Should we put the Pat Austin next to the Golden Celebration...or across the path?  Believe me, it's much easier to move a marker than it is to dig up a rose bush and replant it!

Bare root roses in the bath before going in the ground
6.  We followed the directions we gleaned from our research and from both rose growers.  As the David Austin roses were all bare-root, we soaked them in a large, galvanized tub for at least 6 hours prior to planting.  Mr. T used this time to get the holes ready in the spots we had previously identified as the permanent homes for the named roses.

7.  He dug the hole with the shovel, lifting out some of the heavy clay soil.  Then he used the Mantis tiller to turn that hole into a receptive location for tender roots.  He added about 1/2 bag of shredded, composted leaves we had collected last Fall and about 1/4 bag of an organic compost called Moo nure to each hole, tilling as he went.  I then added 1/2 cup bone meal and a scant 1/3 cup Epson salts (remember, it's not a salt at all; it's magnesium sulfate...and noted for helping build a strong stem structure in roses), and he gave it one more whirr.

8.  Once the holes were ready, we brought the bare root roses out of the tub, into the garden.  DO NOT ALLOW THE ROOTS TO GET DRY!  We build little mounds of amended soil in the middle of each hole to correspond to the root structure of each bush...making sure that we were NOT burying the graft.  We live in an area of hot, humid summers and usually mild winters, so we do not cover the graft with soil, as other parts of the country might need to. We covered the roots, made sure we tamped the soil down to eliminate air pockets, and then created "berms" or moats around each rose with more of the soil.  This will help in the watering process later on this summer.  We also added another layer of leaves as mulch as a "topping" to the moated areas.  Then, we watered well.

9.  We will make sure the new roses receive at least 1" of water every week, with more if this summer is particularly hot and dry (as last year was).  We will not fertilize until we see a good deal of new green growth or for another 4 weeks, until the roots begin to take hold. And we will follow all the good advice on pruning to help establish the "bushy" structure of shrub-type roses.

Whew! A lot of work...and we have high hopes for reaping great rewards.  We'll keep you posted.

In my next post, I'll update you on all the gardens in the Way Back, as April is an exciting time for the Kitchen Garden, the Orchard, the Berry Patch, and the Rose Garden!

Until then, happy hoeing!

===============================NOTE============>>>>>

You can now SHARE each post, using the button(s) below.  Or, you can LIKE this blog, using the blue Facebook LIKE button in the right column.  Your choice!!  And many thanks!!!


Monday, April 2, 2012

Third Time's the Charm

It's Year Four for the Way Back Garden...and Year Three for my Gardening with the Giants blog.  Just as the start of Spring brings hope to every gardener and opens the possibilities of the coming months, so too has this Spring brought hope and possibilities to me.

Reclaiming the Way Back
100 bags of mulch
Paths done!
Only 50 bags of mulch to go!!


I am happy to report that, after a sad and unproductive 2011, this year is looking fantastic!  The Way Back went neglected and unattended last year, while our energies and efforts were directed to helping Mom in the final steps of her journey (the details of which I posted on the family blog The Adsit Adventure). But, in the first quarter of the year, we are making great strides at reclaiming our quarter-acre of paradise.

So far in 2012, we have:

Mr. T fills the potato grow bags
  1. Redesigned the Four Year Plan, designating the lower-left quadrant of the Way Back as the Kitchen Garden and the lower-right quadrant is now the Rose or Cutting Garden (we call it both...:).  The upper-left continues to be designated the Orchard and the upper-right continues to be the Berry Patch. (To recap, the Way Back is an almost-square quarter of an acre, fenced on all sides, nestled under the transmission lines of Duke Energy...the "Giants" of this blog's title.  The only trees are on the periphery, which means we have almost full sun in this area...great for veggies, fruit trees, berries, and roses.  We are making a silk purse out of a sow's ear, if ever...:)
  2. Planted a row each of cabbage, broccoli, spinach, lettuces, carrots, and beets in the Kitchen Garden. Onion sets were interplanted with the cabbage and broccoli. All are doing well, with the exception of the carrots...which have been slow to break through the crusty clay soil...and I still have the cabbage and broccoli under row covers to protect them from pests.  Weeded the asparagus bed, which is in its second year and beginning to produce shoots. 
  3. Planted 6 grow bags (purchased from Gardener's Supply; photo, above/right) of Yukon Gold potatoes (from seed potatoes, purchased at Tractor Supply) and one row of Russets (from potatoes sprouting in my kitchen, originally purchased at Harris Teeter grocery...:).
  4. Used over 100 bags of mulch (see "before"  and "mid-task" photos, above) to re-mark the paths and the Rondel, which is what we call the center oval where the paths dissect.  Prior to putting down the mulch, Mr. T put a layer of old newspapers, covered with a layer of Preen black landscape fabric. Hopefully, this will block the grass and weeds that sprouted through the original mulch in the Rondel.
  5. Ordered, received, and planted 11 new fruit trees from Stark Bro's Nursery in Louisiana, MO, in the previously-prepped holes in the Orchard. [Mr. T had triple-tilled the holes and added several bags of leaves as compost.] We now have planted 18 dwarf fruit trees (remember, we are limited by the easement agreement with Duke Energy to trees of 15 feet or under), including two cherry trees, three pear trees, two peach trees, ten apple trees, and one crabapple tree.  All are doing well, with the exception of one of the apple trees, which is one of the ones we purchased at Tractor Supply and planted last Spring.  I think it will need to be replaced this Fall.  Meanwhile, we plan a rest area in the Orchard, with a paver-patio and a covered swing (which we got on our last Tractor Supply run...:).
  6. Ordered, received, and planted 12 new roses from David Austin Roses (3 William Shakespeare, 3 Golden Celebrations, 2 Huntington Rose, 2 Gertrude Jekyll, and 2 Susan Williams-Ellis)  in the newly-tilled and prepped Rose Garden quadrant.  Mr. T has also assembled and stained a new teak glider that will be placed on a stone-paver patio we will lay.  We will place a bird bath and a feeder across the path from this patio, so that the bluebirds will have their own Bistro near the two bluebird houses on the fence.
  7. Tilled and retilled...and populated the new strawberry bed in the Berry Patch with runners from the "old" bed (that was tilled under to create the Rose Garden). We had so many runners that I have planted strawberries in every empty pot and hanging basket I could find.  All are doing well...and many are already flowering and fruiting. 
  8. Fertilized all the blueberries (which are already flowering), the blackberries, and the grapes in the Berry Patch.  Also, fertilized the crepe myrtles and privet.
  9. Seen our first snake of the season...and lived to tell the tale about it..:)
  10. Ordered and installed 2 (of 5) cottage garden corner fences, to mark the corners of ...and the path between...the Rose Garden and the Kitchen Garden.
  11. Pruned and started the feeding of all 18 rose bushes, in the back yard and in the Rondel.  Two didn't make it through the heat of last year's summer and the (mild) winter, so I replaced them in February.  All are looking good; most have buds already!
  12. Started 4 kinds of tomatoes and fish pepper seeds in peat pellets/egg cartons.  They are now under the grow light on the screen porch (which is still plasticized).  The tomatoes are getting their first true leaves (the ones that arrive after the seed-leaves) and will be ready to move into larger accommodations (3" pots) this week.
  13. Placed...and received (while I was composing this...:) our Lowe's order for the materials to construct two patios in the Way Back and one "pad" that will run from the driveway, under the double gates, and into the back yard.  More on this in a later post.
Whew!  I'm tired just recounting what we've already accomplished! Here are a couple of shots of some of the work:

Rondel and paths are mulched in the Way Back.
Row covers on the cabbage, broccoli, and lettuce (left)

Standing in the Rondel, looking toward the Berry Patch:
Blueberries in raised beds...blackberries behind them.
New Strawberry Bed on lower right.

We have an outstanding order with Roses Unlimited for 9 hybrid teas, and another order in with David Austin for 14 more English roses...all of which are scheduled to arrive over the next few weeks.  I got several perennials at Home Depot on Friday (when we took both cars to pick up 35 more bags of mulch to create mulch rings around the fruit trees...and to cover the path in the Rose Garden), and I will be adding those to the Rose Garden to give us some color while we are waiting on the English roses to grow.  I also picked up some herbs that I shall pot up in larger pots.  I am trying Boxwood Basil this year, with the plan to use it as a border between the Kitchen Garden and the center path.

Gus says...time for a break!
I have a long to-do list for the garden for this week, but I'll save it for the next post.  I don't know about you, but I need a break after all of that.

Lemonade, anyone?

Tuesday, May 3, 2011

May Arrives!

Another basket of leaf lettuce...and an onion
The month of May has arrived, with welcome sunshine and much calmer weather.  I don't know about you and your garden (wherever that may be...:), but we are happy for the respite from the severe thunderstorms and tornadoes of April.

So, how is our garden doing these days?  I've neglected this blog for a variety of reasons, one of which is that I've spent more hours in the sun than I have at the keyboard.  And, that's as it should be...this time of the year.  From April 15th (often quoted as the Average Last Frost Date for this area, although there is data to show that it's as early as April 3rd for High Point) onward, there is something going into the ground almost daily.

Speaking of the Last Frost Date, I broke the rules and put five tomato plants in before April 15th. Three of them succumbed to the blistering hot temps and high winds we had the day after I put them in the ground, but two of them survived...and are thriving! Here's hoping for some Better Boy tomatoes by July 4th!
And with the more-than-an-inch-every-week rains we have been experiencing, the lettuce (photo, above), onions, carrots, beets, and peas are leaping out of the ground.  As are a wide variety of weeds.  Sigh.  I wish I could say the same for the spinach, which is sadly stunted.  Still, I mustn't complain...for, this time last year, we had no lettuce, peas, or spinach.  The bunnies had eaten them all.  The onions shriveled up and died from a dry spell.  And, the carrots never even made it up through the hard-packed Piedmont clay soil.  So, all-in-all, our 2011 Spring Garden is a winner already!

Why no bunnies this year? you ask.  Well, remember...we put a temporary fence across the back property line so that the dogs can now go into the Way Back garden without fear of their wandering away.  I believe that the bunnies don't care for the scent of the hounds...or, else, it's because I've planted onions everywhere this year, and the bunnies don't like that scent.  Whatever.  All I know is that we are harvesting lettuce in '11, thank goodness.

The potatoes plants are rising higher and higher, in spite of being covered with 5 bags of leaves.  I think we will have to mound some dirt on them to keep them from getting too much light.  And, I may have to wait until Fall for cabbage; but I'm not pulling up the plants just yet.  We'll see.


Strawberry bed...loaded with blooms...
looking toward the lettuce and onions
Oh, and I really should mention our strawberries.  I created a small bed (photo, left) and put in several plants last year, which did not flower due to how late I got them in and how hot and dry the Spring weather was in general in 2010.  So, just like it says in all my garden books, all the energy went to developing runners (or "daughter plants").  After I enlarged the bed last Fall, by incorporating the space formerly occupied by the sweet potatoes,  I transplanted the daughters.  They over-wintered under straw and row covers...and apparently settled in rather well.  Additionally, I allowed the 7-Top turnip greens, in the rows adjacent to the strawberry bed, to continue to grow from last Fall's crop through the Winter...right on into Spring.  They had loads of beautiful yellow flowers, which attracted lots of bees and other pollinators...who went right to work on the strawberry flowers as soon as they appeared last month.

Well, we have loads of berries that should begin to ripen this weekend!  What a treat that will be, to go out to the garden and pick strawberries for our morning cereal bowls.  I'm already picking so much lettuce every-other-day that I've threatened to start serving salads for breakfast (!).  Berries would be better, for sure.

Speaking of berries...the 3 new blueberry bushes we got at the 4-H sale are loaded with berries, too.  And, the 2 thornless blackberry bushes are flowering and showing signs of putting on berries.  The "naturalized" blackberries (the ones with the wicked thorns...:) have tiny flowers, too, so we shall see which have the tastiest fruit soon.

I noticed today that the pole beans I planted recently are beginning to pop up, as is the corn.  I had covered the corn with row covers to protect the tender shoots from the crows who frequent the garden, but the recent high winds just whipped the covers right off.


Mardi Gras Rose bud -
Way Back Garden, April - 2011
I did get some herb transplants in the bed that runs along the side of the center path:  sage, dill, parsley, basil, oregano, and thyme.  I planted some nasturtiums there, too, after I nicked the seed-pods with a nail file (called "scarification").   Then, I planted some zinnias and marigolds from seed we collected from last year's crop.  I started a new bed next to the picket fence with some gladioli corms and more zinnia and marigold seeds. We currently have roses blooming (photo, right), along with iris; soon, we will have daylilies abloom.  I think herbs and flowers are every bit as important to our garden as the fruits and vegetables.

Coming up this week...the Annual Master Gardener Passalong Plant Sale at the Guilford County Extension Center on May 5-6. I've been tending several "babies" that I started in the Propagation Workshop we had in March.  I've also been working on a Culinary Herbs display for the Festival area. 

Going in the ground next:  the rest of the tomatoes, the peppers, the squash (yellow, zucchini, and patty pan), the cantaloupes (which are really muskmelons...:), the watermelons (3 kinds!), and the eggplants.  All of these are currently growing in the controlled environment known as the plasticized screen porch.  Then, I'll purchase some sweet potato slips, and lastly I'll plant some okra seeds and some purple hull (AKA: Southern) peas.  And, then it should be time for the pumpkins to be planted.  It's so exciting!

OK, that's the Garden Report for the first week in May.  If you'd like to see what you should do in your Piedmont garden this month, be sure to check out my article on GoGreen.com:  http://gogreentriad.news-record.com/content/2011/04/29/article/mastering_the_possibilities_of_may.  I'm sure it will have a short shelf-life, so look quickly!

Happy Hoeing!

Tuesday, March 8, 2011

This Week in the Garden

New Beginnings:
Southside Community Garden
in High Point
With apologies to the Chinese...

Give a woman a vegetable and she'll eat for a day.  Teach a woman to garden, and she and her family can eat well forever.
OK, so I trampled that Chinese proverb about fish(ing) for my own purposes.  Sorry.

Still, it says what I want to say about my latest Master Gardener volunteer activity, working with the Southside Community Garden here in High Point (photo, right).  Ah, but I'm getting ahead of myself here.  Let me take it back a couple of paragraphs.

Last week was a busy one, gardening-wise.  I got the seeds started for some tomatoes, green and cayenne peppers, eggplants, and more herbs.  They are all currently basking in the glow of the light-tube on the shelf in the plasticized screen porch (AKA:  our greenhouse), as I mentioned in my last post. 

Thomas and I tilled up rows for more lettuce and carrots, and I planted a row of beets.  I purchased some red-leaf lettuce plants, some cabbage (3 kinds) and broccoli plants and got them in the ground just before the rains came, along with three kinds of potatoes:  Kennebec, Irish Cobbler, and Red Pontiac.  Whew!

On the Master Gardening front, I had lots on my plate.  On Tuesday, I was the assistant for the Speaker at a presentation on Culinary Herbs to a group in Whitsett (a very long way from High Point...:).  I really enjoyed this experience and hope I'll be able to do Speaker's Bureau more often throughout the year.

Wednesday was our regular class day, with the topics being Flowers and Houseplants.  Then, on Thursday, I found out that my article on "What To Do in the Garden in March" had been published online at GoGreen.com. Yippee!  Writing gardening articles is another activity I enjoy...and hope to continue.

Also on Thursday, I assisted with another speaker's bureau presentation...again on Herbs...but this time beyond McLeansville.  A really, really long way away.  I had no idea Guilford County was such a whopper!


Move that mountain of mulch!
 Then, on Saturday, I got to help get that new community garden going...this one, right here in High Point!  I loved working with the folks who are just starting...or, in some cases, returning to...their own gardening journeys.  Such a joy! 

My job for the day was to help move a mountain of mulch that the city of HP had delivered to the site...one wheelbarrow-load at a time (photo, left).  When someone mentioned how wonderful the mulch smelled, I realized that it was because of the Christmas trees.  Yep, our Christmas tree had indeed been recycled into mulch for the garden paths at the new Southside Community Garden.  How great is that?  (Sealed the deal on whether to have a real or an artificial tree...:)

Back on the home front, we got over an inch (!) of gentle rain, so everything is looking happy and healthy.  I'm already seeing the spinach and the peas popping through the clay crust that is our soil.

Chores for this coming week:

  • Pull the weeds in the strawberry patch.  Rake away some of the straw mulch.
  • Keep checking on the seeds in the greenhouse.  Remove the protective covers when they sprout.
  • Empty the compost barrel onto the garden; mix into the soil.
Happy hoeing!

Saturday, February 26, 2011

Let's Get This Season Started!

There has been just enough warm weather to make me want to get outside and play in the dirt...how about you?

First things first, though...
Under the Grow Light:  Lettuce and Herbs

I have a metal 5-shelf shelving unit set up inside the screened-in porch, which has been "plasticized" and is where the ferns, palms, and assorted over-wintering plants are residing during the cold weather.  I keep a small fan/heater going most of the time to attempt to keep the temperature from ever dropping below 50 degrees.  Think of it as a greenhouse...I do.  And, last weekend, Mr. T attached a fluorescent light fixture under the top shelf to give me direct light for starting seeds (photo right). Yippee!!

Over the past week, I got started with my herbs (parsley, rosemary, and thyme), including a couple of pots of chives that were created when I divided one big, overgrown pot from last season.  Then, I couldn't stand it, so I popped a few Ferry-Morse Early Girl tomato seeds (left over from a packet from the 2010 season, which I'd kept in the refrigerator in an effort to keep them "fresh") in some seed starting mix (I use Jiffy Organic Seed Starting mix which I purchased at Tractor Supply last weekend).  And, last but not least, I seeded an oblong deck planter with Grand Rapids leaf lettuce, which is said to be the best variety for "greenhouse" or cold-frame plantings.  Am happy to report that the lettuce has sprouted and is growing toward the light!

Season 3:  Row Covers protecting (r. to l.)
carrots, spinach, lettuce and onions
Right now, about the only thing growing in the garden is the onions planted last September.  I've got several rows seeded and row-covered (for protection against the cold nights) in the garden (photo, left).  I haven't checked them today, so I'm hoping I'll find that things have germinated since the Big Rains of the past two days.  I also put in a half-row of garlic last week, knowing full-well that garlic goes in in the Fall...but I couldn't find any seed-garlic last Fall, and I did find some last week at (you guessed it...:) Tractor Supply.

That's not all we found at TSC:  bare-root apple trees!  I know, I know.  My Master Gardener Training class a couple of weeks ago convinced me that we had to make a change in our plan of planting our orchard this Spring to planting it this Fall, when there is a better chance of success.  But, who can resist little tiny sticks with colorful tags picturing fat, juicy Cortland and Golden Dorsett apples?

Season 3:  Planting the first apple trees in the orchard
A Cortland and Two Golden Dorsetts
In watching the weather report for the week ahead, we saw that the Big Rains were on the way for NC, so Mr. T moved all the machinery into the Way-Way Back to do the final digging on the holes to plant the new apple trees (photo, right).  He'd already made the first dig last year, mulching the tops of the holes with oak leaves for the Winter.  Now, it was time for the deep digging, so he used the big tiller to assist him.  We also incorporated a "Sidney" idea:  when planting a tree, add a vertical length of pipe that will help you water directly to the roots for the first few years.  I remember my Daddy doing this with a dogwood tree he planted near the back door of our house in Henning...and I remember how healthy that dogwood was.  He finished the plantings off with water-collars (berms of soil around the tree, to aid in getting more water to the root system) and a layer of oak leaves for mulch (photo, left/below). 

Gus supervises Mr. T as he plants the
Cortland Apple Tree - Season 3

Of course, if these apple trees don't make it through the Long Hot Summer to come, I'll feel terrible...and totally responsible.  But, if they do...I'll be ecstatic!  Fingers crossed...trowels, too!


Tasks for the week ahead:
  • Start seeds of broccoli, cabbage, and peppers in the greenhouse.
  • Plant a row of beets, a row of head lettuce, and another row of carrots in the garden.
  • Cut up the Yukon Gold seed-potatoes to let them "seal" before planting in the garden after March 1st.
  • Continue to set up beds and rows.  April will be here before we know it!

Monday, February 7, 2011

What To Do in Your Garden in February

Let's face it.  Here in Zone 7, the month of February can be such a tease.  One day (like today) it's 48 degrees.  Another day (like last weekend), it's 68 degrees.  And yet another (like our forecast for tomorrow sounds), "38 with possible snow flurries."  What's a gardener to do?

Create a checklist of things that you can do, including some indoor activities for those bitterly cold days you know are standing between you and Spring.  Before we get to the checklist for February, be sure you've done the following first:

    
    Soil testing in the veggie garden - 2011
    
  1. Create your plan, if you didn't do this in January, including your kitchen garden (veggies, herbs, and edible flowers), your orchard, your berry patch, your flower and speciality gardens (such as a rose bed, bog or wetland garden, and containers), and your lawn and natural areas.  Get some graph paper to make it easier to draw your plan to scale, or invest in a software application that will do this for you, if so inclined.
  2. Do your soil testing (photo, right) to determine what your soil needs for optimal conditions for what you plan to plant there, if you didn't do this in January.  Here in North Carolina, soil testing is free (as of today...:); you can obtain the soil test boxes and instructions from your county extension office.  Be aware that the longer you wait to submit your soil test(s), the longer it will take to receive the results.  This is the same time of the year that farmers are submitting their tests, too, so the line will be substantially longer than if you did your soil testing in December or January.  You will need to re-test every 3-5 years.
  3. Contribute to your Garden Journal on a regular basis.  Keeping a record may sound like a time-consuming chore, but it is actually a time-saving tool.  You will be able to review what you did in the past, what worked, what you would change or do differently.  You will also have access to what your garden looked like two, three, or ten years ago...without having to rely on memory alone.  Consider creating a spreadsheet to keep track of monthly chores and planting activities.  Or, use one of the one's found by an online search.  Here's a link to one by the Farmer's Almanac folks that you can adjust by entering your own zip code:  http://www.almanac.com/gardening/planting-dates/NC/High%20Point

Checklist for February, Zone 7, Piedmont of North Carolina --


First rows tilled in 2011
Peas planted
 Kitchen Garden:
  • Select seeds from catalogs as early as possible.  Some varieties do sell out rapidly, especially some of the heirlooms.  Visit websites for the most up-to-date information.   Check out the extension service for your area to find suggested varieties that do well in your climate and soil, such as the one by the North Carolina Extension Service:  http://www.ces.ncsu.edu/depts/hort/hil/pdf/hil-8103.pdf
  • When the weather permits...and the soil is dry enough to work...till a few rows to prepare for planting early Spring crops (photo, right/above)
  • According to the Wyatt-Quarles Seed Company's Seed Guide, you can plant the following, beginning February 1st:
    • cabbage plants (Early Jersey Wakefield, Stonehead Hybrid, All Seasons);
    • carrots (seeds of Danvers Half-Long or Imperator);
    • endive (Green Curled)
    • mustard (Southern Giant Curled, Tendergreen, Florida Broadleaf, Old Fashion);
    • onion sets (Silver Skin, Yellow Danvers); garden ("English") peas (Super Sugar Snap for edible pods; Early Alaska, Wando);
    • radish (Early Scarlet Globe, Cherry Belle, White Icicle);
    • spinach (Dark Green Bloomsdale, Hybrid 7); and
    • turnip (Purple Top White Globe, Seven Top for greens only, Just Right Hybrid)
  • Beginning February 15th, you can plant:
    • beets (Detroit Dark Red)
    • broccoli plants (Italian Green Sprouting, Premium Crop)
    • kale (Dwarf Curled Scotch, Early Siberian)
    • kohlrabi (White Vienna)
    • leaf lettuce (Salad Bowl, Buttercrunch, Black-seeded Simpson, Romaine)
    • head lettuce (Great Lakes, Iceberg)
  • As the end of the month approaches, you can start the following seeds indoors for transplanting later:
    • tomatoes
    • pepper plants
    • some herbs
  • If you have overwintered the plants, divide thyme and chives.
Orchard and Berry Patch:
  • Plant fruit trees, blueberry and blackberry bushes, and grape vines.
  • Prune established grape vines.
  • Prune fruit trees.

Flowers, Scrubs, and Trees:
  • Plant or transplant trees and scrubs.
  • Plant bare-root roses.
  • Divide perennials like day lilies and daisies.
  • Prune trees and evergreen shrubs; however, wait until after blooming to prune forsythia and azaleas.
  • Fertilize spring bulbs as soon as you see the leaves breaking through the ground; remember to leave the leaves on daffodils, even after the flowers bloom in order to feed the bulb for next year's growth.
Other:
  • On those bitter cold days, tend to your indoor garden:  check all houseplants for pests or any signs of stress or disease; trim off any dead leaves; and make sure you are watering with room temperature water and diluted fertilizer solutions. 
  • On milder days, clean up debris and downed limbs from the garden areas.
  • Perform any required maintenance on mowers, tillers, and power tools to get them ready for the coming season.
  • Clean and sharpen all garden tools, especially if not done at the end of the season last Fall.
  • Check all garden furniture to see what needs painting or repairing.
  • Check out garden catalogs, websites, and the library for new gardening titles to read on those indoor-only days.  On that note, I will be reviewing the book, "Garden Your Way to Health and Fitness," in a coming post. Watch for it!
  • Be sure to keep up with your own off-season exercise program.  You do NOT want those muscles to go unused all Winter...and then feel every single one of them come the first warm day of Spring.  Let's be building our core strength in preparation of what lies ahead for us.  


See, we have plenty to do, even though we can't be in the garden every day of February.

Happy Hoeing!


======================================================
Sources for information for this post include: